

Contacts
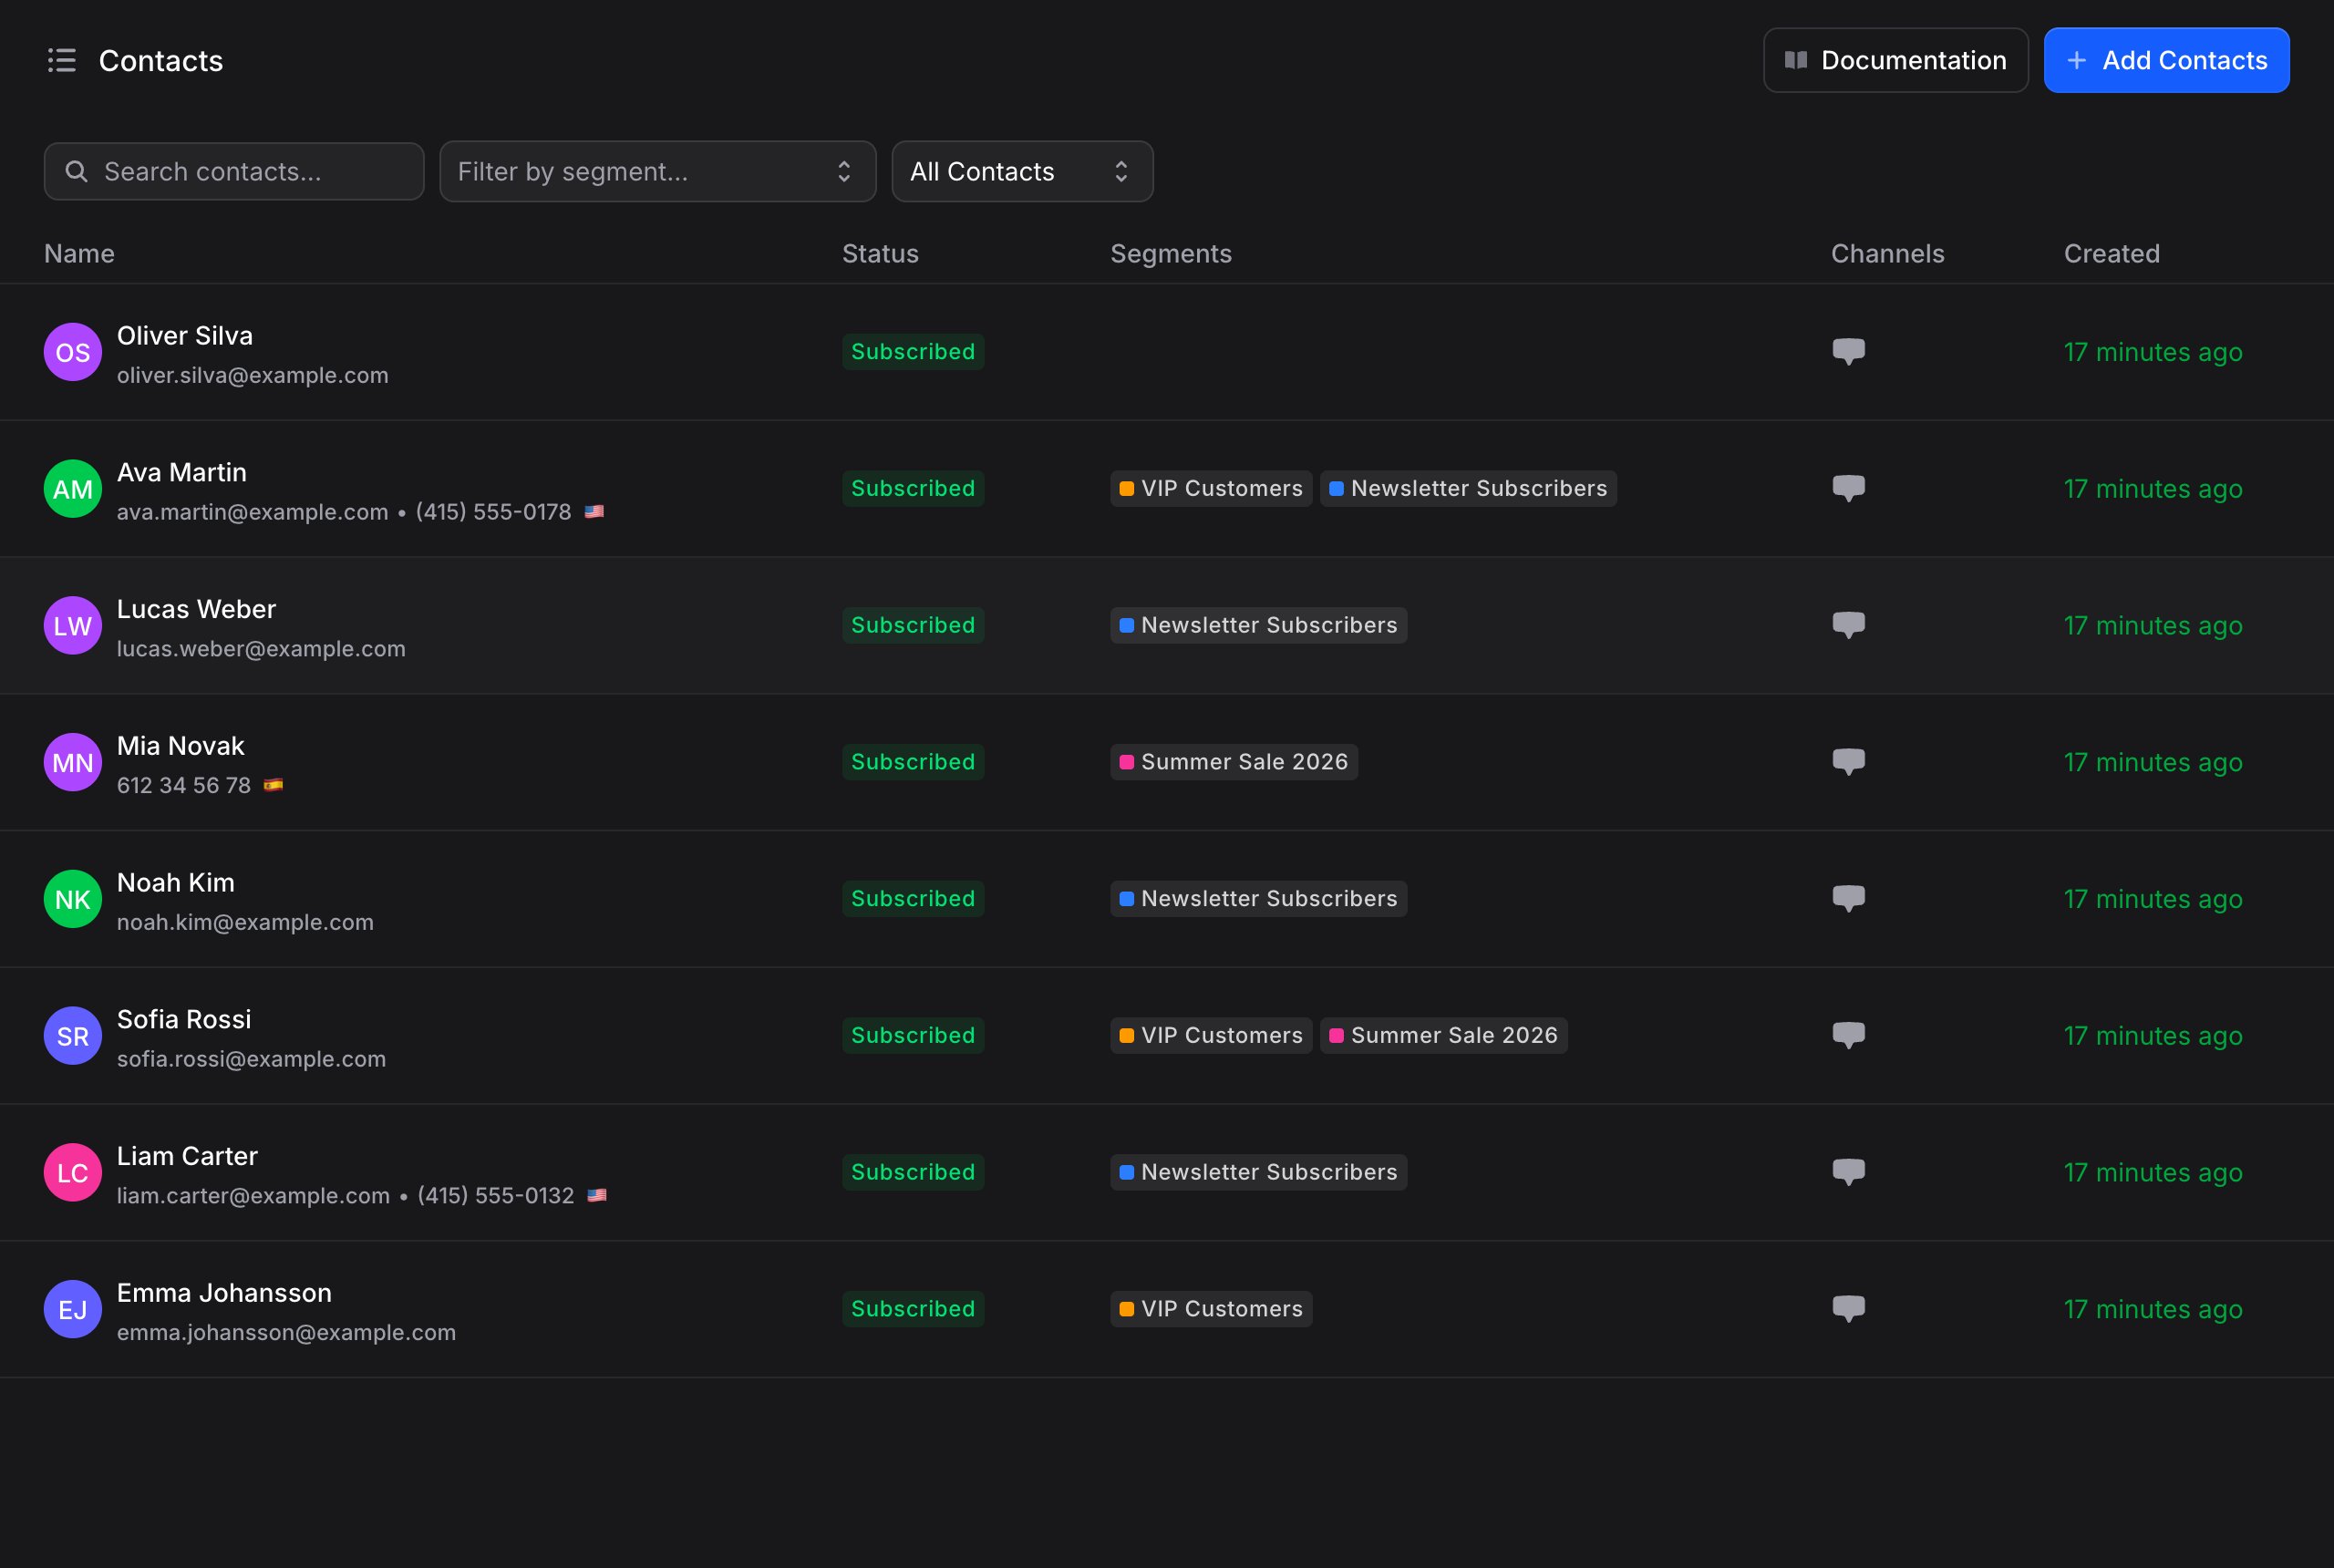
The Contacts page shows every person in your audience. Each contact displays:- Name and identifier: The contact’s name along with their email or phone number
- Status: The contact’s subscription state (Subscribed / Unsubscribed / Blocked, plus an AI-replies-off indicator)
- Segments: Any segments they belong to (shown as badges)
- Channels: Icons showing which channels they’ve interacted through (web chat, WhatsApp, Telegram, etc.)
- Created date: When the contact was first added
Adding Contacts
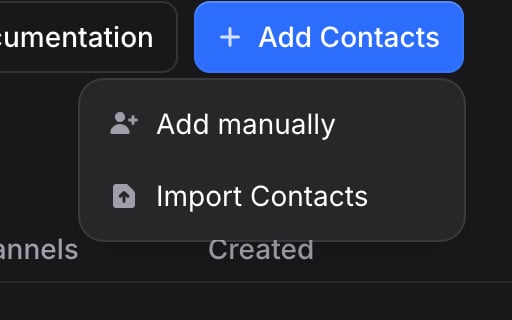
Click + Add Contacts in the top-right corner to see two options:- Add manually: Create a single contact by entering their details
- Import Contacts: Bulk import contacts from a CSV, Excel, Numbers or OpenDocument file
Add Manually
To add a single contact:1
Click + Add Contacts, then Add manually
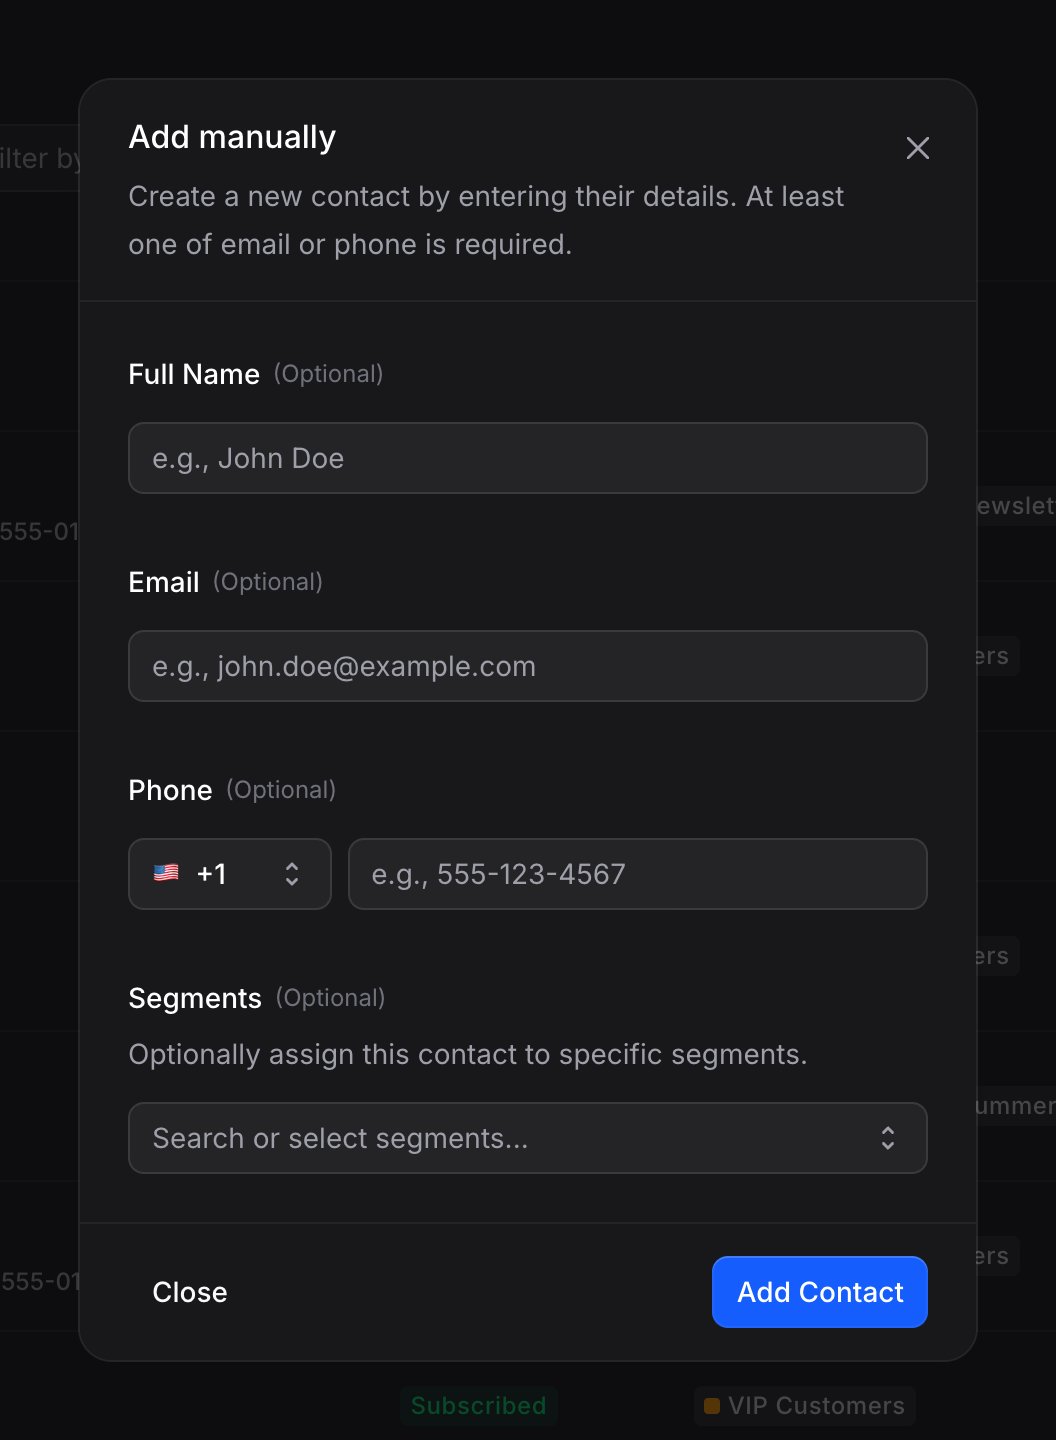
A dialog opens with fields for the contact’s information.
2
Enter contact details
Fill in the following fields:
- Full Name (Optional): The contact’s display name
- Email (Optional): Their email address
- Phone (Optional): Their phone number with country code selector
3
Assign to segments (optional)
Use the Segments dropdown to assign this contact to one or more segments. You can search and select from your existing segments.
4
Click Add Contact
The contact is created and appears in your contacts list immediately.
Import Contacts
1
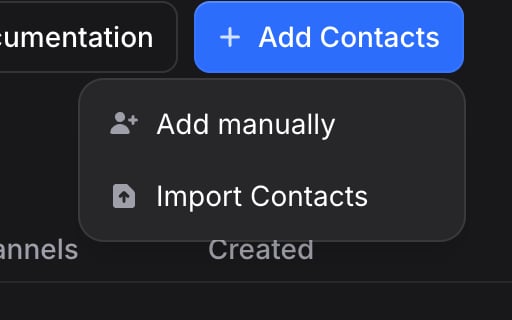
Click + Add Contacts, then Import Contacts
The import page opens with a file upload area.
2
Upload your file
Drag and drop a .csv, .xlsx, .xls, .numbers, or .ods file into the upload area, or click to browse. The first row of your file should contain column headers (like “Full Name”, “Email”, “Phone”). A file can be up to 50 MB, and one import creates or updates up to 50,000 contacts; split a bigger list into several files.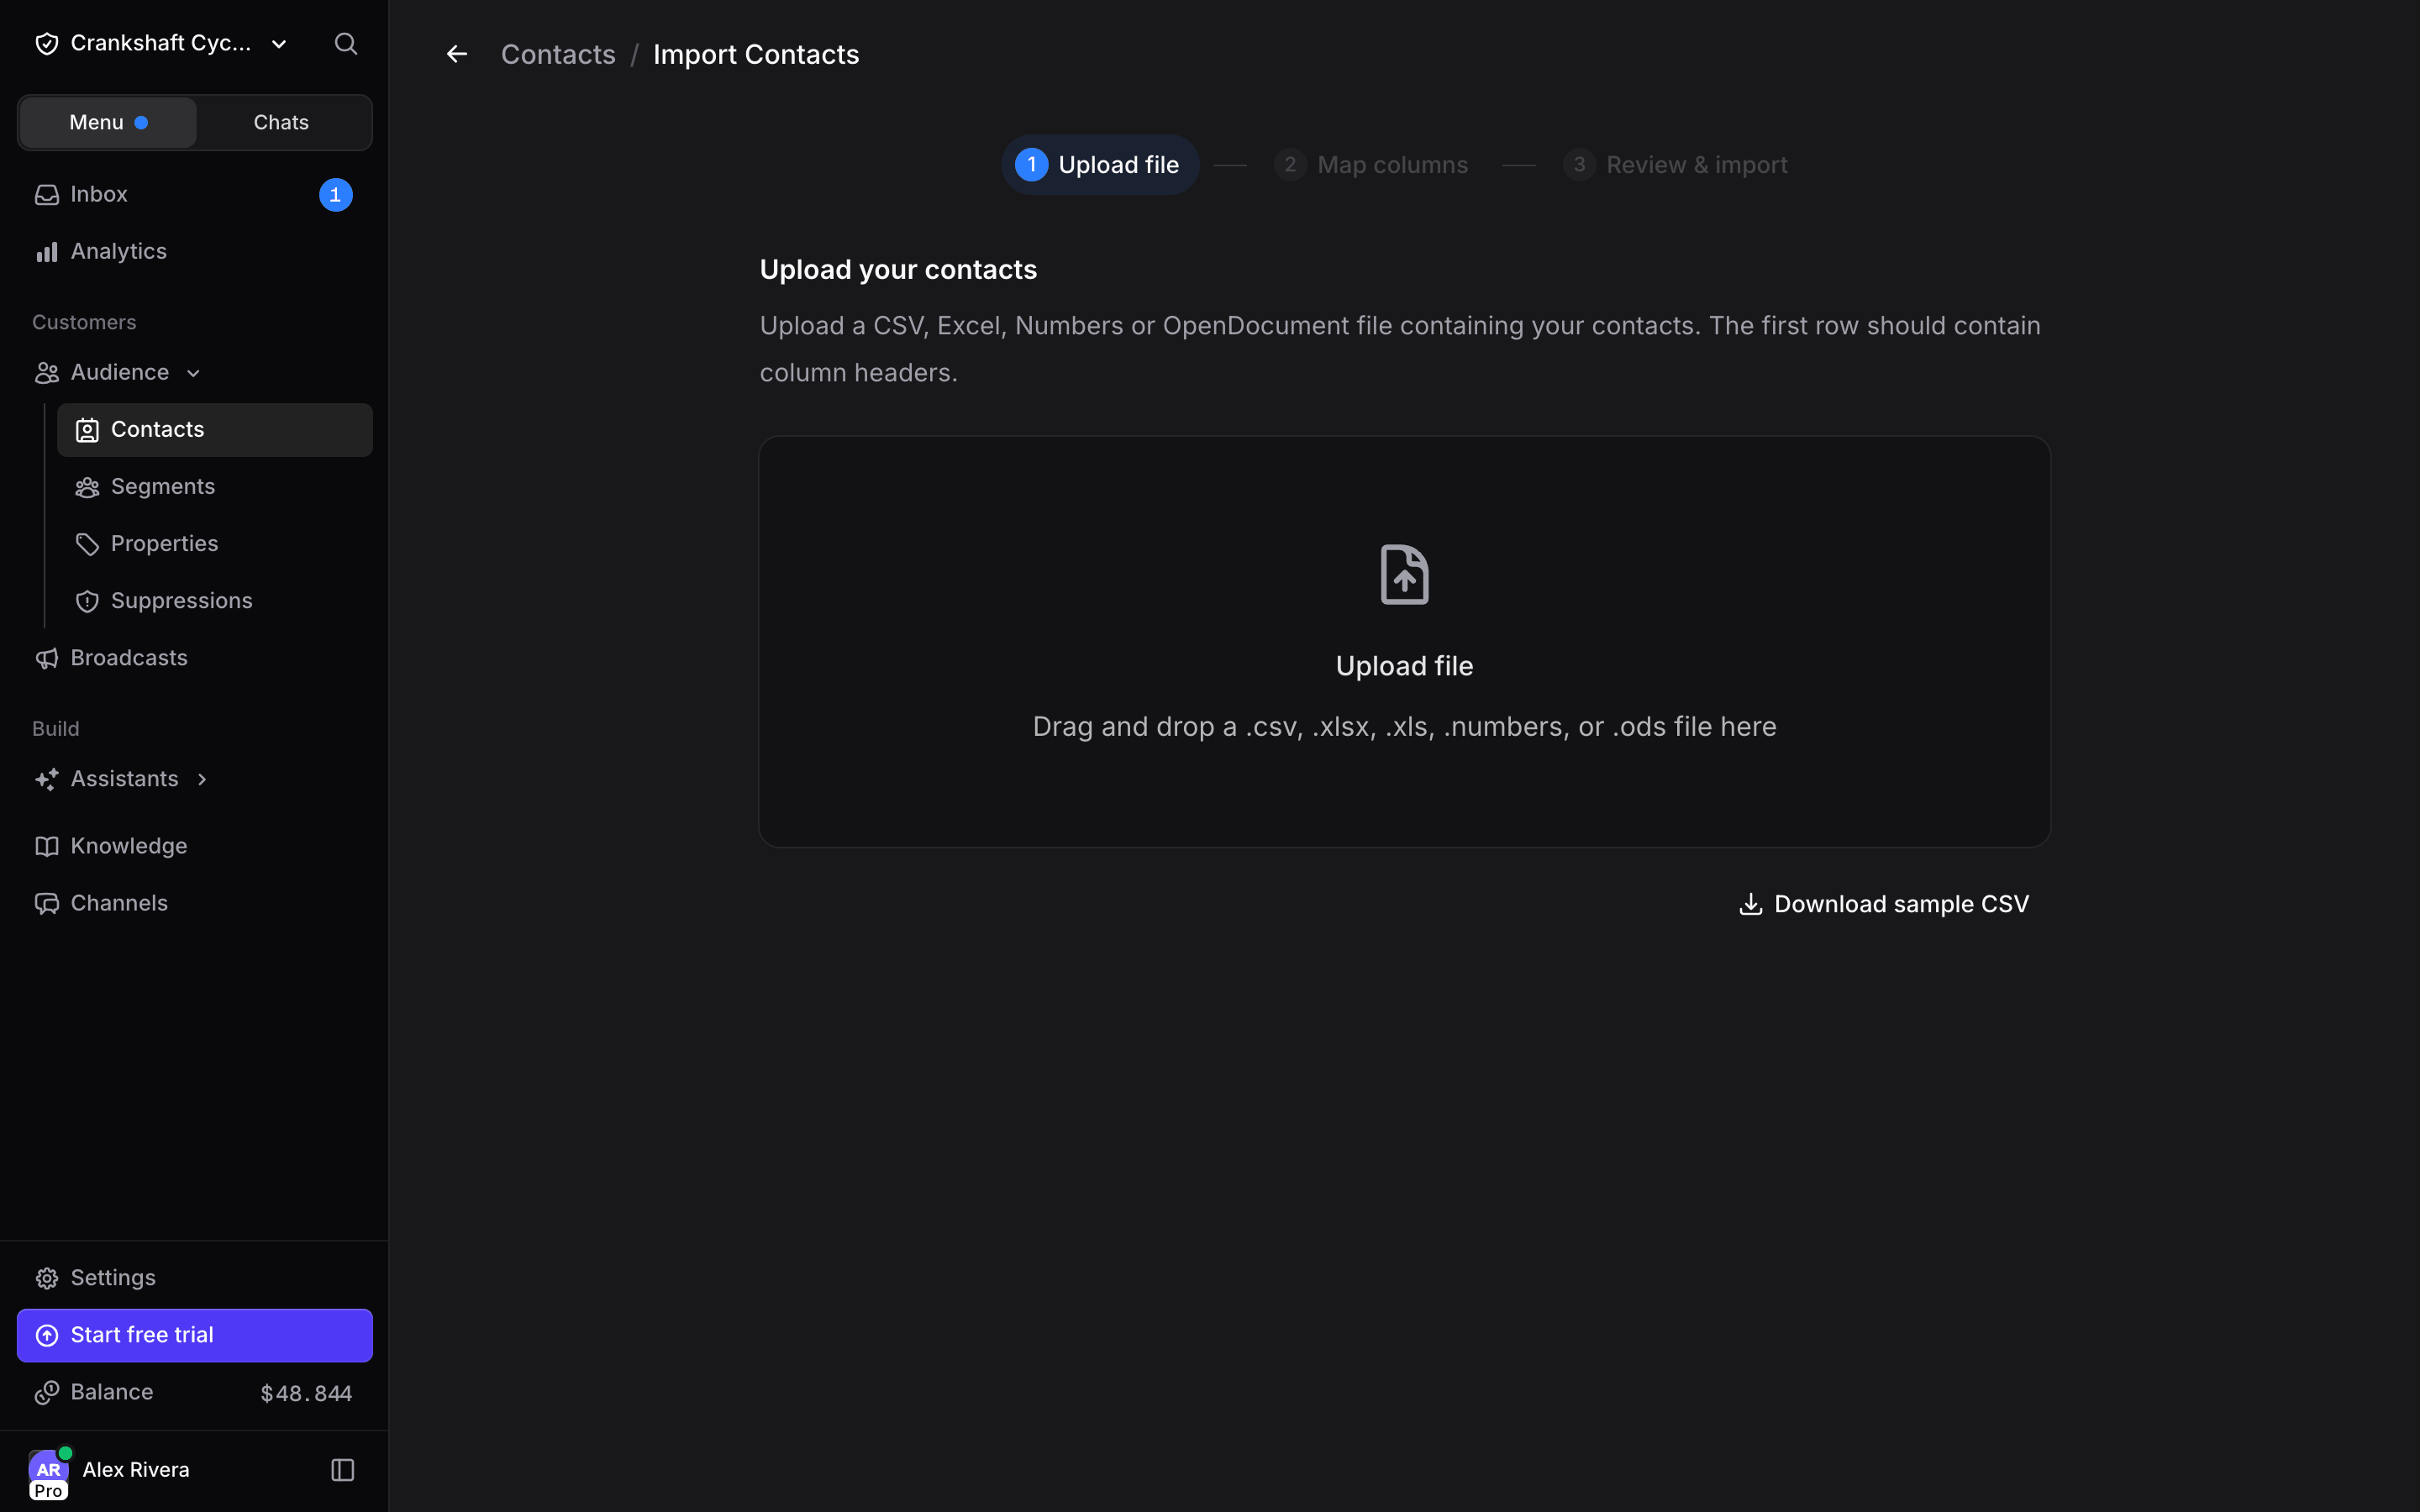
3
Map your columns
After uploading, Invent shows a mapping table with three columns:If the Phone column contains numbers without a 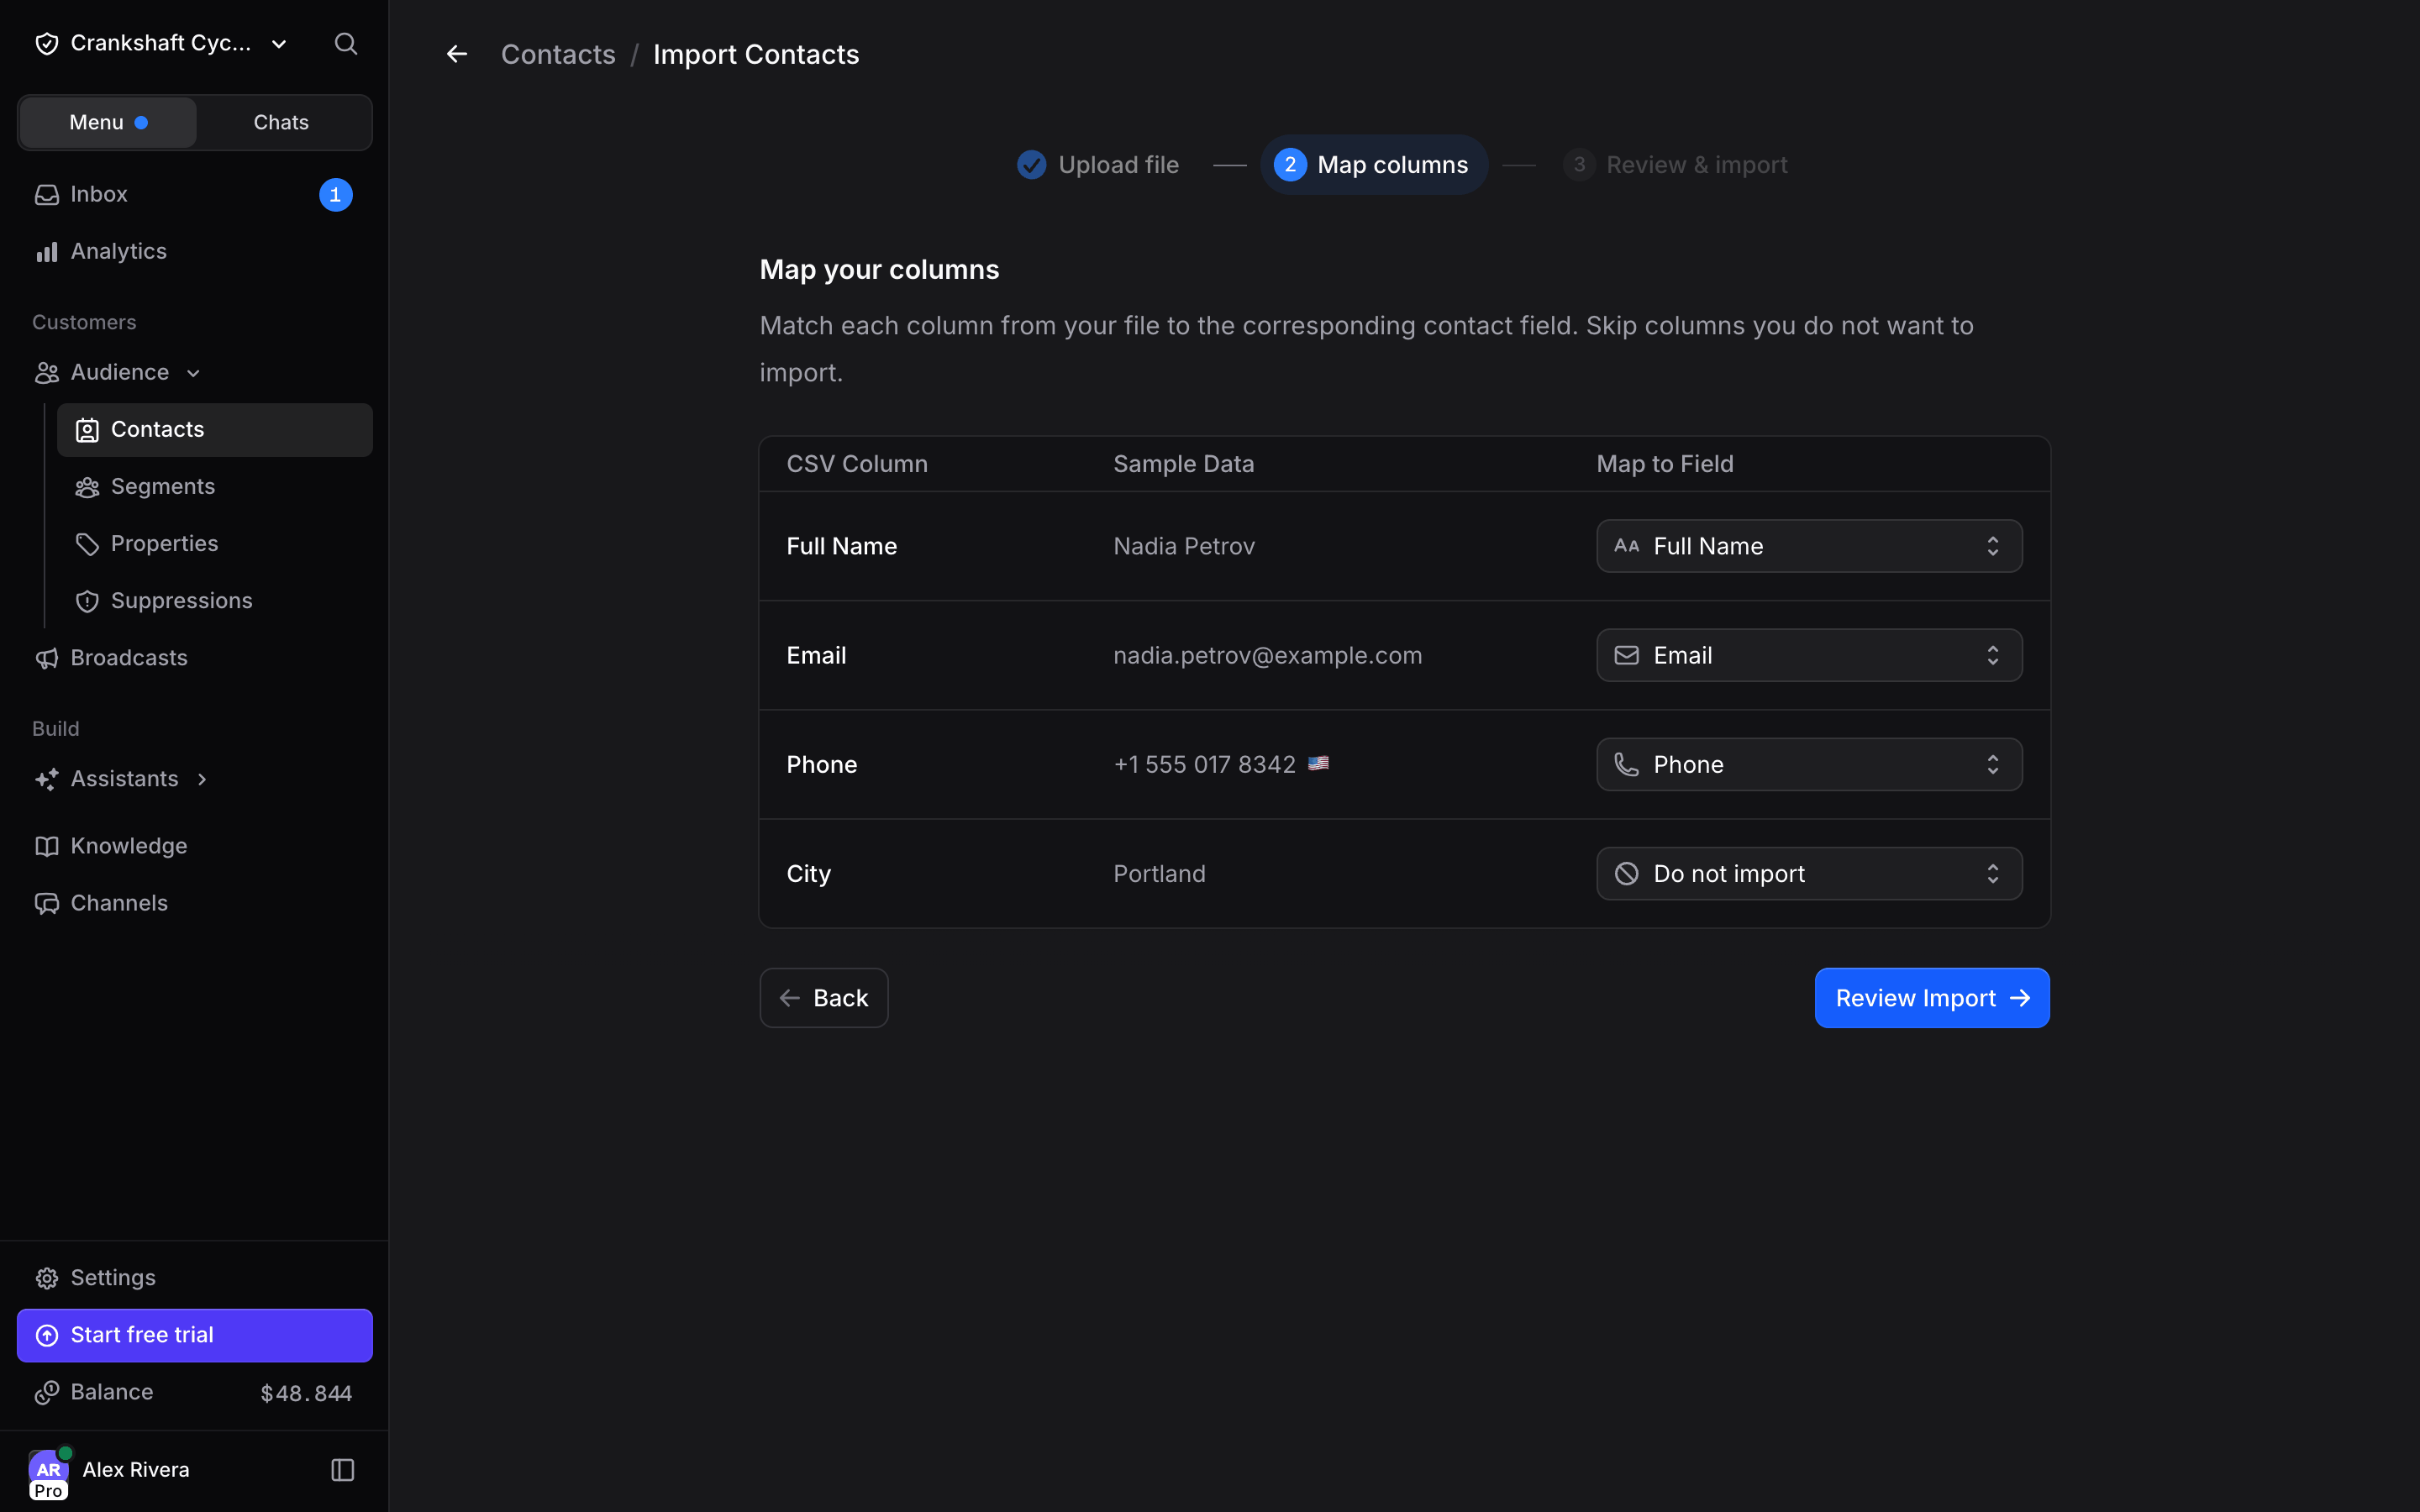
For each column, choose a mapping:
- Do not import: Skip this column entirely
- Full Name: Map to the contact’s full name
- First Name: Map to the contact’s first name
- Last Name: Map to the contact’s last name
- Email: Map to the contact’s email address
- Phone: Map to the contact’s phone number
At least one of Email or Phone must be mapped to continue. Name is optional.
+ prefix, a country selector appears above the table. Those numbers are read as national numbers of that country and get its dial code; numbers that already start with + are left as they are.4
Review your contacts
Click Review Import to see a preview table of all the contacts that will be imported. Verify the data looks correct before proceeding.Above the table, Import to segment (Optional) lets you pick one or more segments for every imported contact, or create a new one from the same field. Skip it to import the contacts without a segment.Rows are tagged so you can see what will happen to each one. Use the chips above the table to filter to Valid, Merged, or Invalid.A common mistake is a 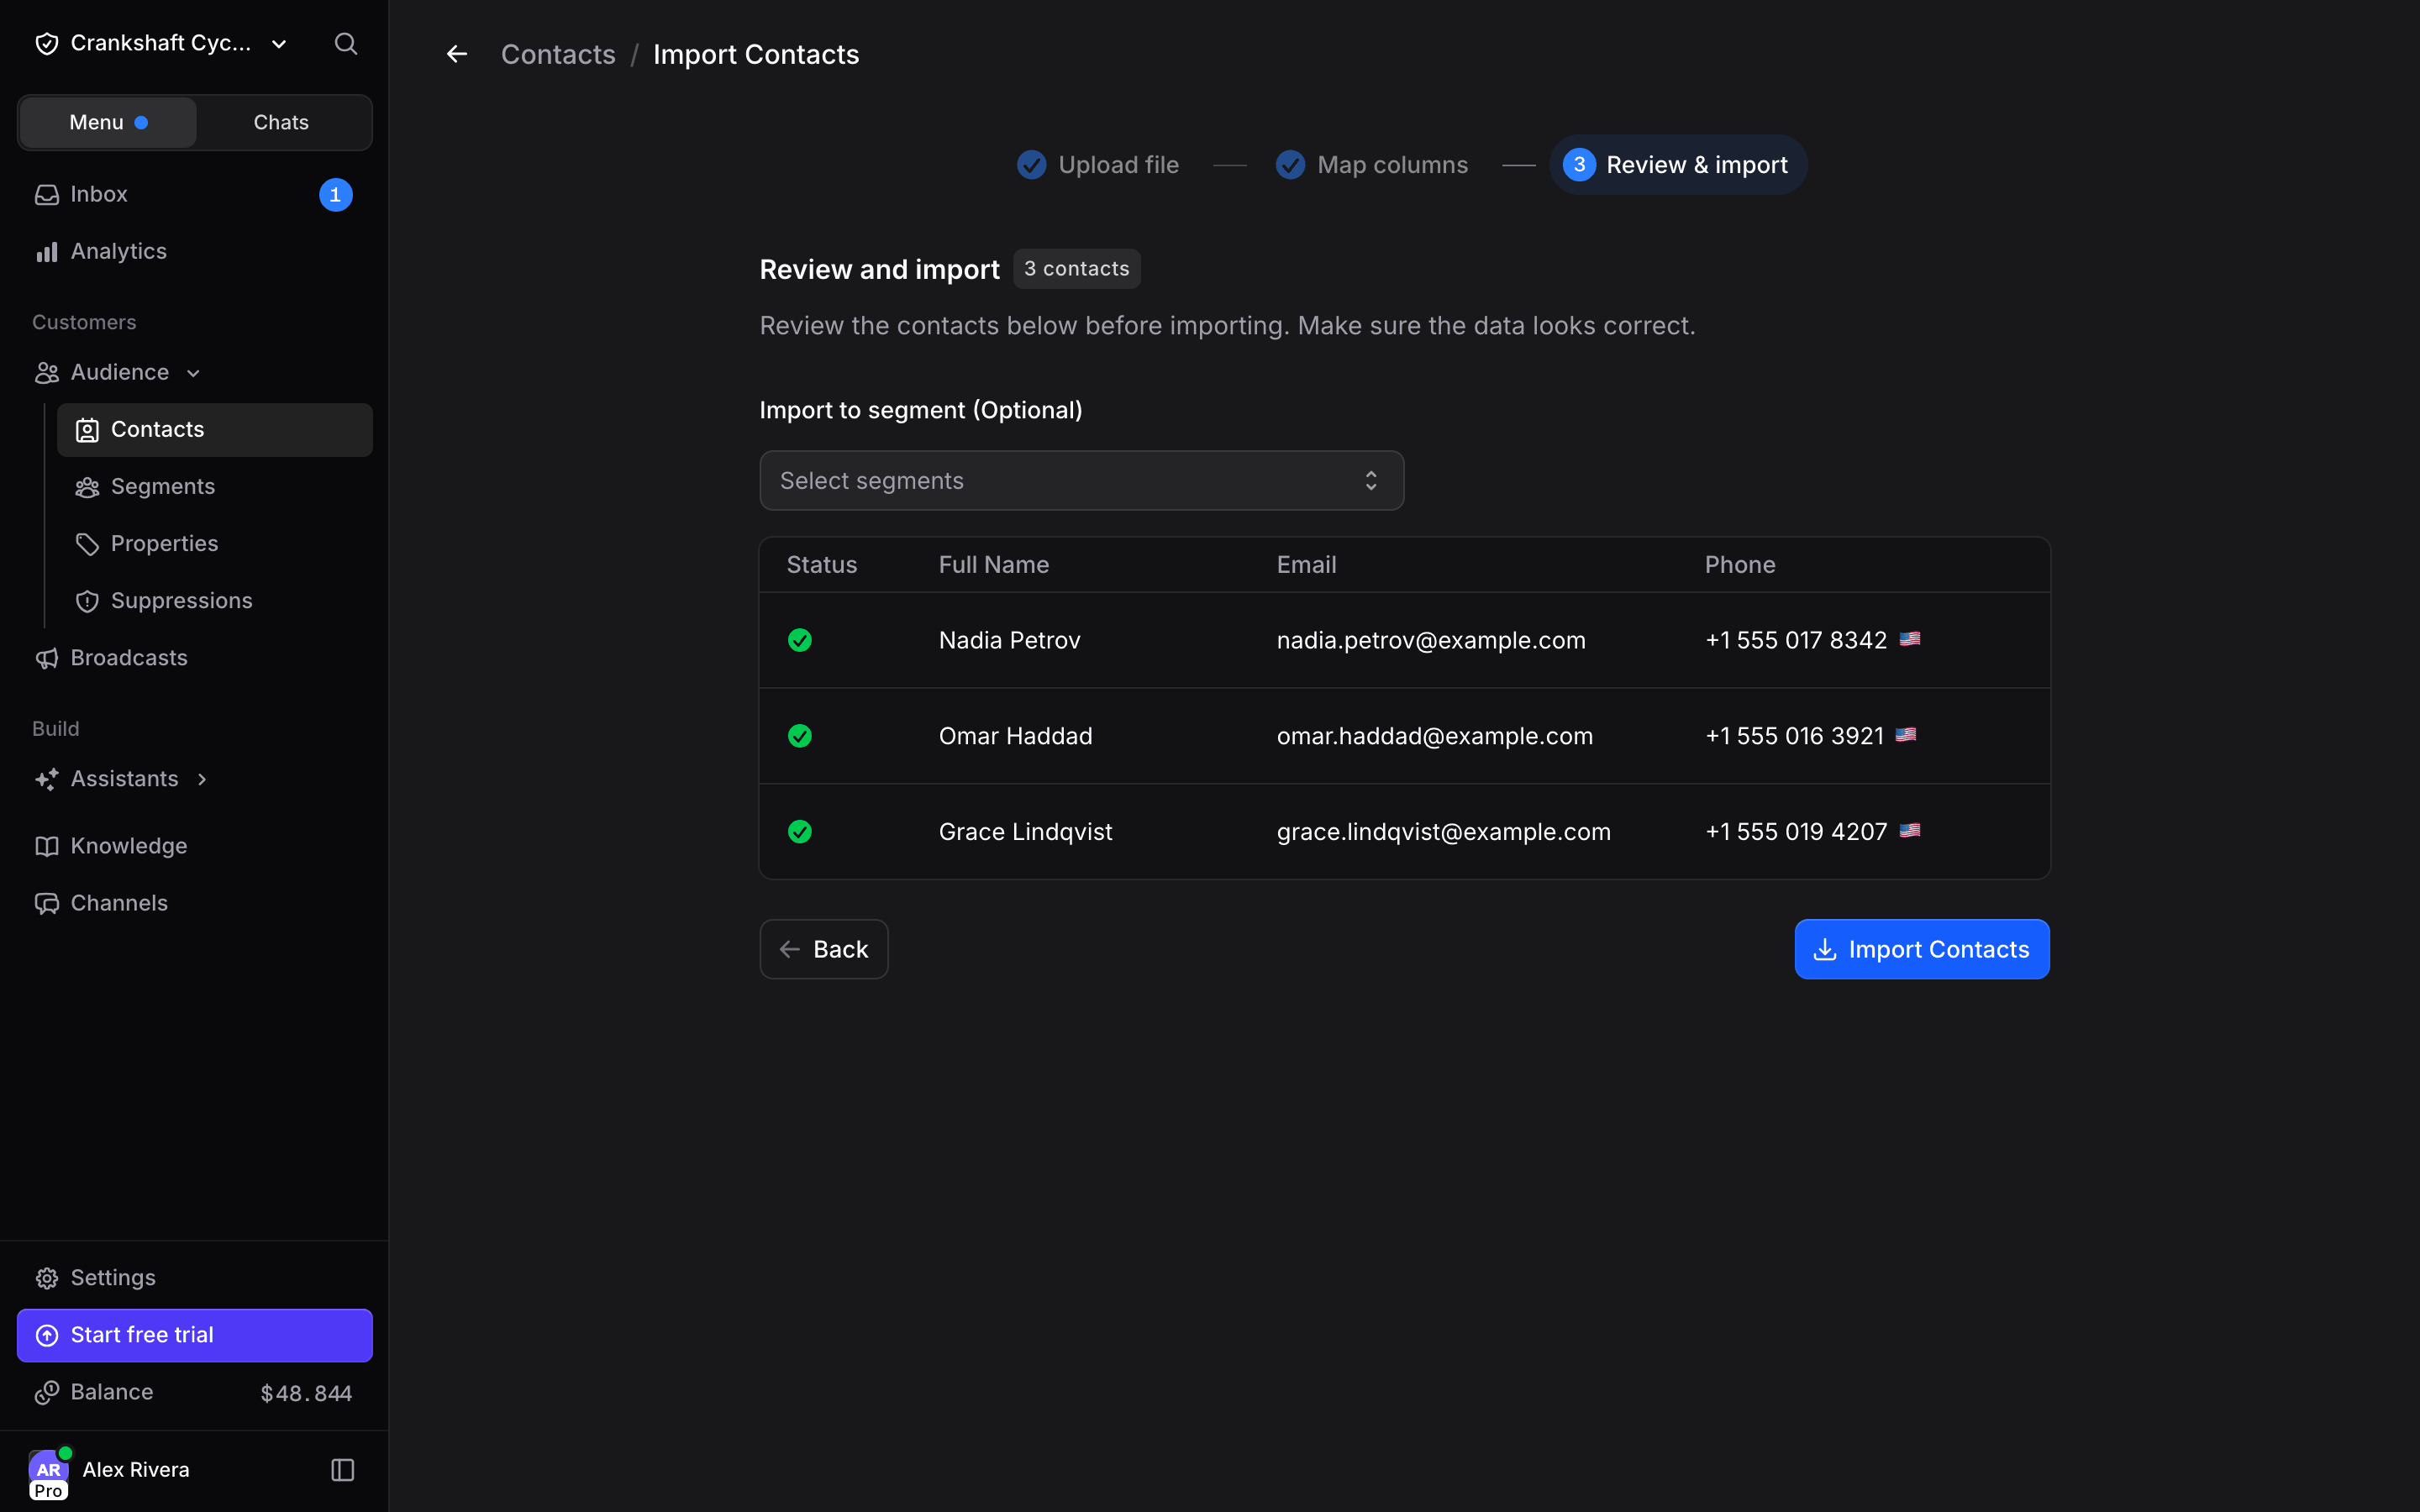
+ in front of a national number, with no dial code after it. When invalid numbers look like that for the country you picked, the warning banner offers Fix and revalidate: one click adds the dial code and checks the rows again.If the same email or phone appears on more than one row, those rows are merged into a single contact and tagged Merged. The first row for that person wins, so put the values you want to keep on its first occurrence.
5
Confirm and import
Click Import Contacts. A confirmation dialog appears asking you to confirm that you have obtained appropriate consent to send messages to these contacts in compliance with applicable laws and regulations.Click Import Contacts to confirm, and your contacts are added to the audience.
Contact Profile
Click on any contact in the list to open their profile panel on the right side. The panel is organized into three tabs across the top: Contact, Files, and Activity.Contact tab
The Contact tab shows everything Invent knows about this person, in order: Segments The segments this contact belongs to. You can add or remove segments directly from here by clicking the segment dropdown. Remove a segment by clicking the x next to its name. Profile Detailed contact information including:- Name: The contact’s display name (click the pencil icon to edit)
- Username: The contact’s handle on channels that provide one (e.g. Telegram, Instagram), shown as @handle
- Country: Detected country with flag
- Phone: Phone number with channel icon (e.g., WhatsApp)
- Link: Direct link to message them (e.g., a
wa.melink for WhatsApp contacts)
Files tab
The Files tab aggregates every file shared with this contact across chats and notes. When there are none, it shows “Files from chats and notes will appear here.”Activity tab
The Activity tab is a chronological timeline of what has happened to this contact: segment assignments and moves, comments, file uploads, property edits, and moderation events such as block/unblock, unsubscribe/resubscribe, and AI replies being turned on or off.Contact actions
Click Message under the contact’s name to start a conversation with them on WhatsApp or SMS. You can also open the menu next to one of their phone numbers or emails and pick Message. Click the three-dot menu at the top of the contact profile for additional actions:- Turn AI replies on/off: Stop or resume your assistants replying to this contact automatically.
- Unsubscribe / Resubscribe: Unsubscribing stops marketing emails and broadcasts; the contact can still message you and get replies. Resubscribing resumes them.
- Block / Unblock: Blocking stops new messages from this contact being stored. This does not block them on external channels like WhatsApp or Instagram. Unblocking starts accepting their messages again.
- Delete: Permanently remove the contact.
Turning AI replies on/off, unsubscribing, and blocking are available to contacts managers. These moderation and consent controls matter for GDPR and marketing-consent workflows.
Contact page
For more room, open the contact as a full page: click the arrow icon (Open in full page) in the panel header, or ⌘/Ctrl-click or middle-click a row in the contacts list to open it in a new tab.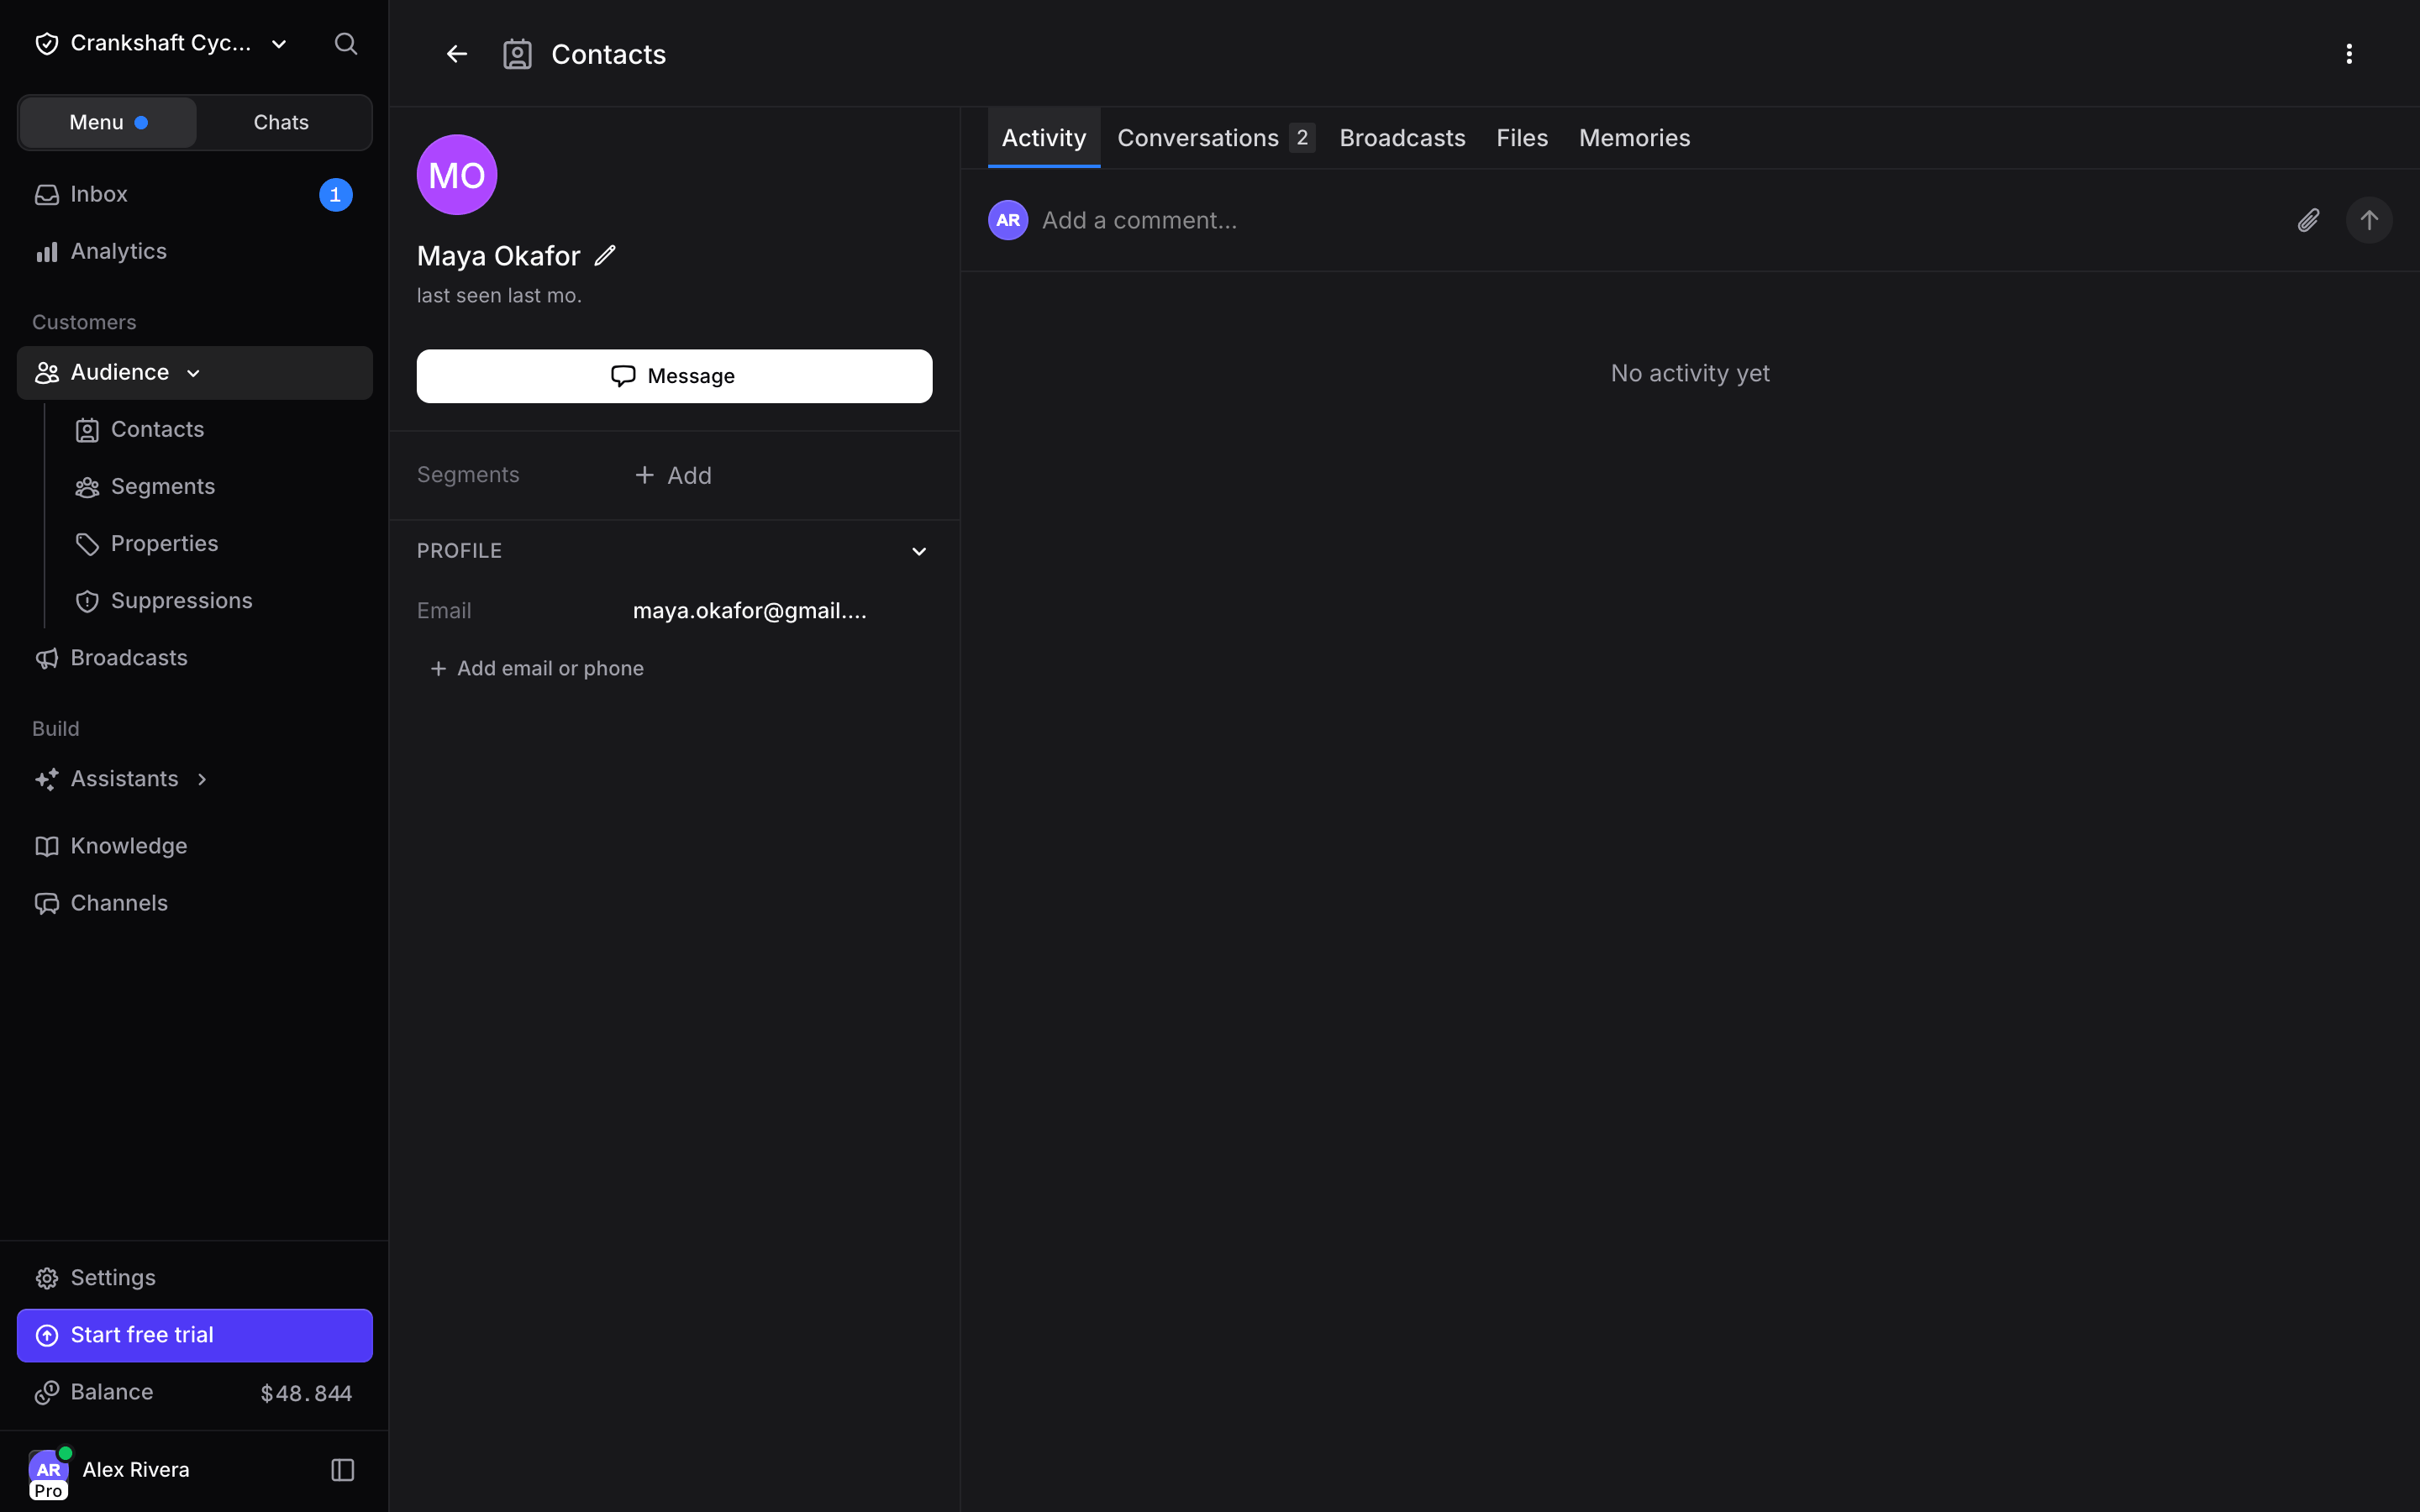
Segments
Segments let you group contacts together for easy targeting. Instead of broadcasting to your entire audience, you can send messages to specific groups, like “VIP Customers”, “Newsletter Subscribers”, or “Beta Testers”.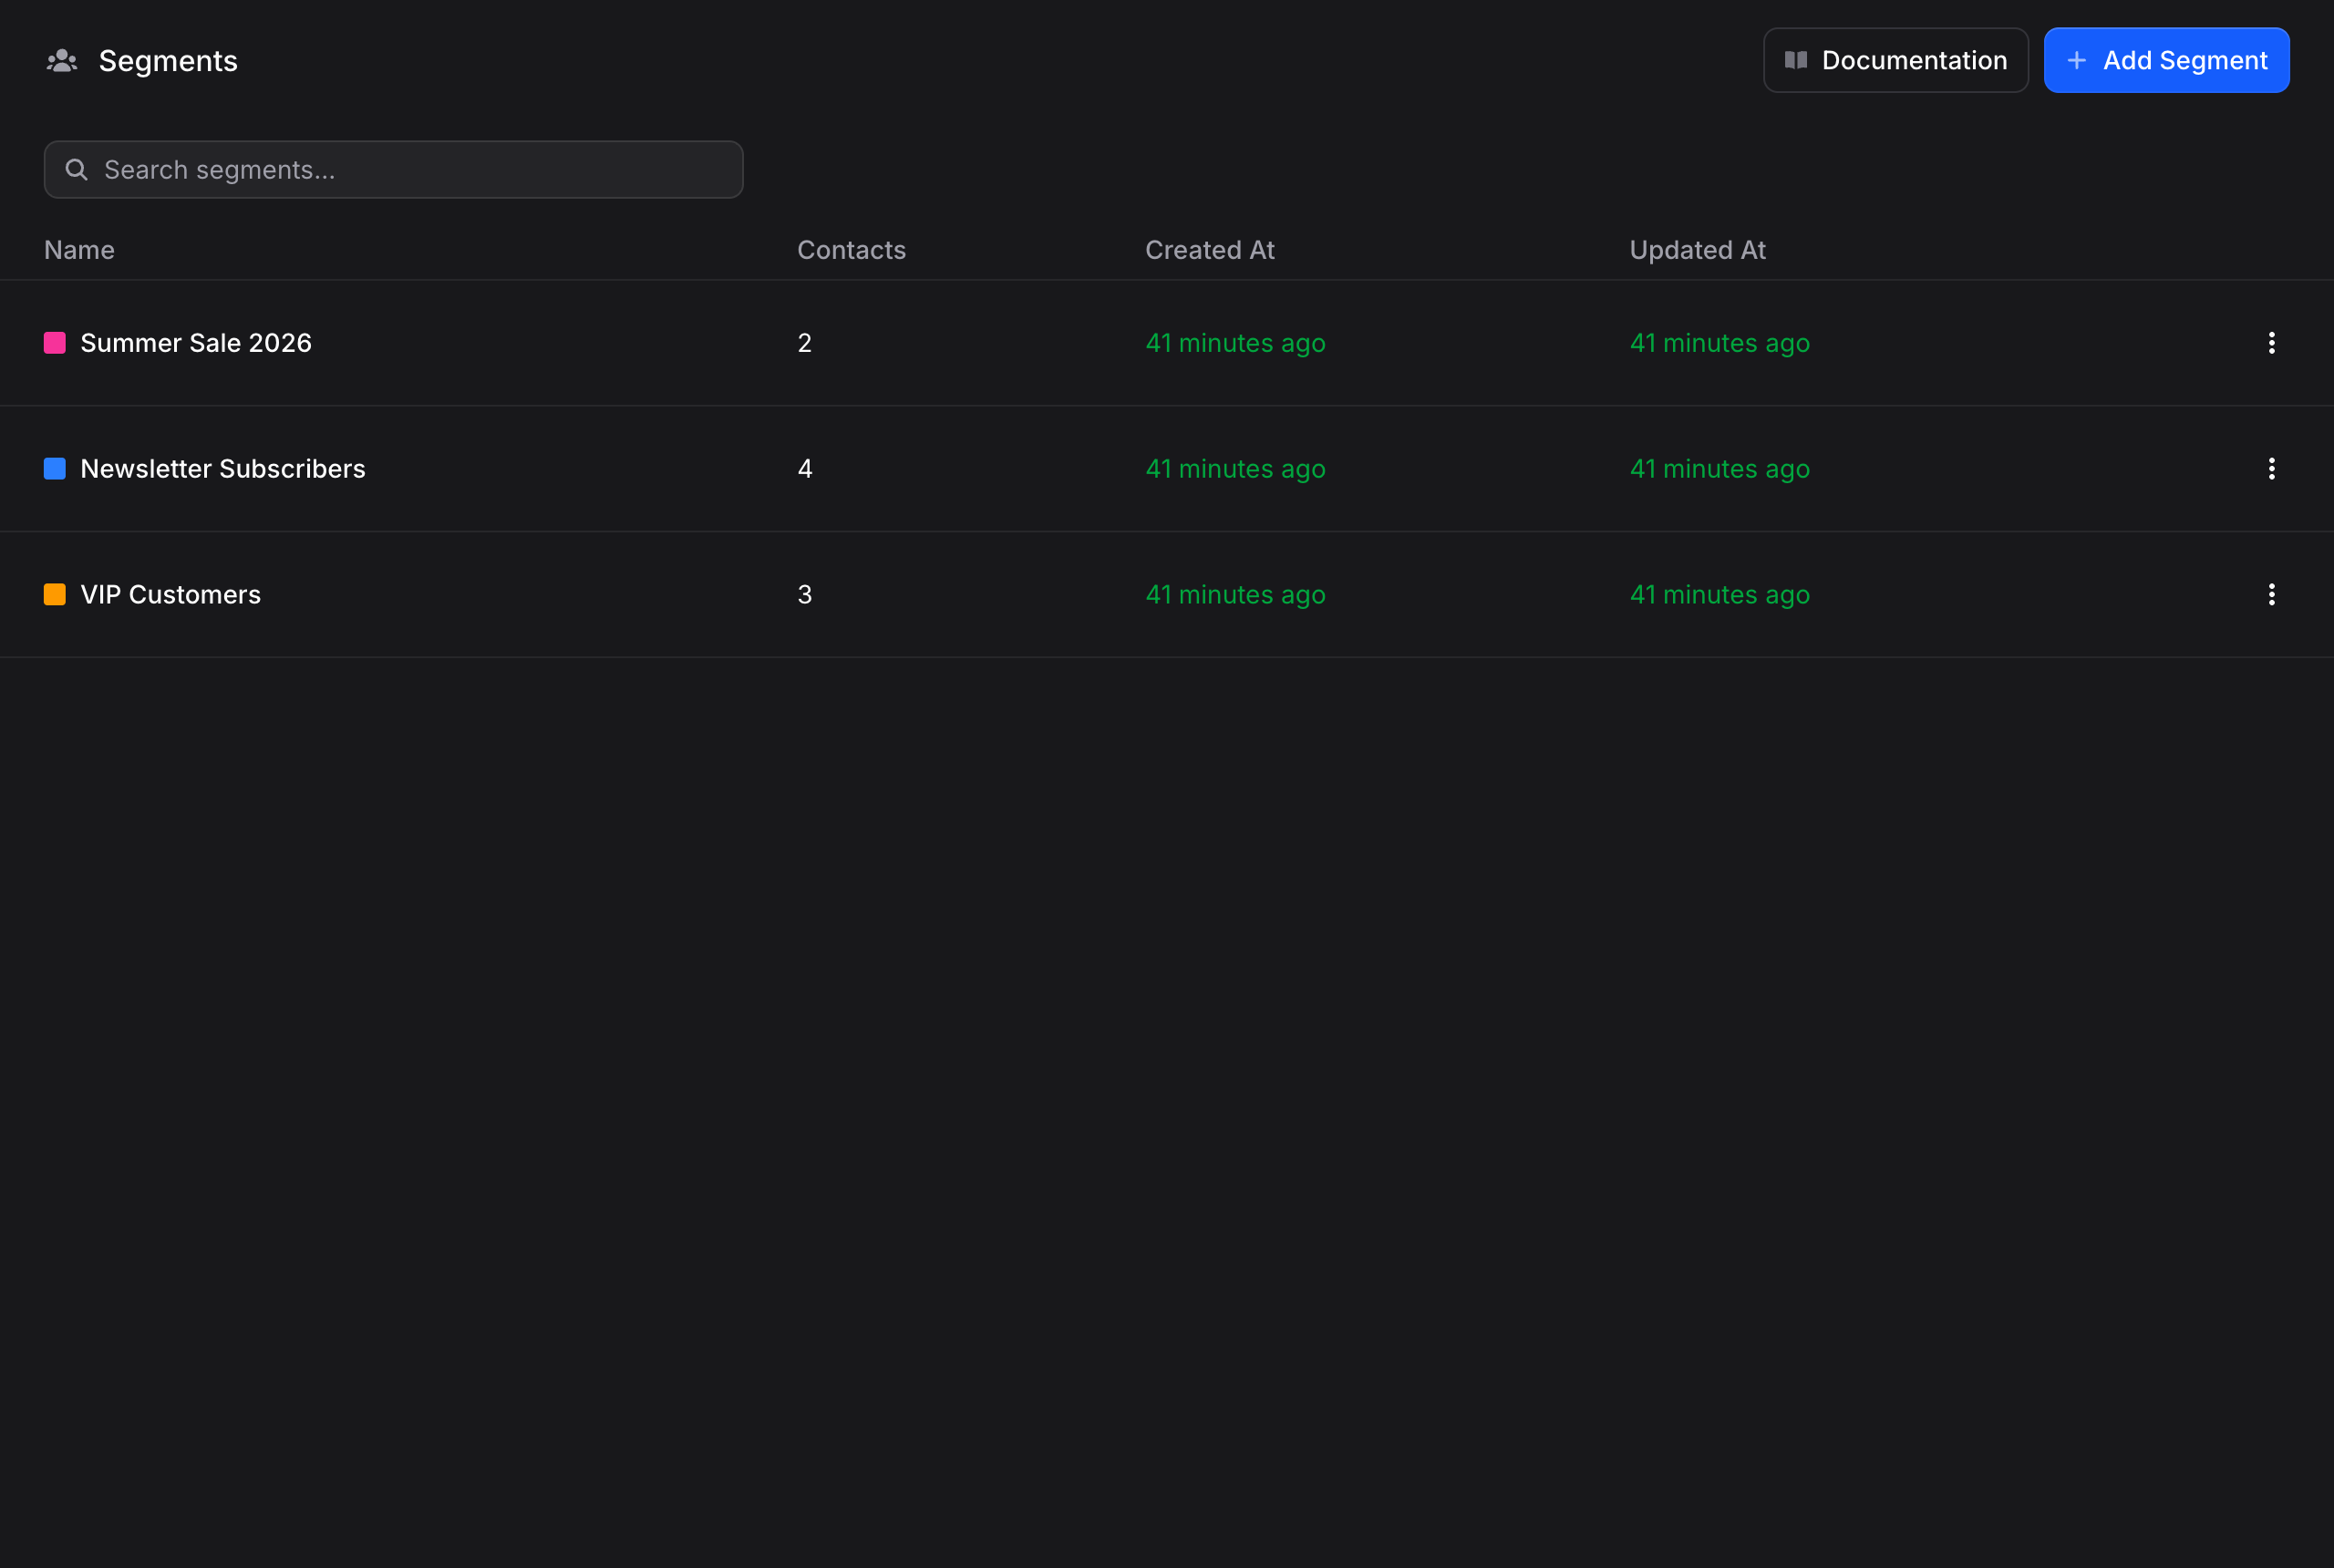
Properties
Properties are custom fields stored on every contact: a size preference, a loyalty tier, a renewal date. Define them once and they appear on every contact profile, ready to be filled manually, via the API, or automatically by your assistants. See the Properties guide for the available types and how to manage them.Suppression List
The suppression list is your workspace’s do-not-contact list, keyed by email address and phone number. Bounces, spam complaints and unsubscribes land there automatically, and nothing on it receives a broadcast or an automated message again. See the Suppression List guide for what it blocks, how to add entries, and how to import a list from another tool.Best Practices
- Create segments early: Set up segments like “Promotions”, “Product Updates”, and “VIP” before you start broadcasting. This makes targeting much easier later
- Capture data with properties: Define properties for the contact data your business cares about, and let assistants keep them up to date
- Keep your audience clean: Regularly review and remove contacts who are no longer relevant
- Combine with broadcasts: Segments are most powerful when used with broadcasts to send targeted messages to the right people at the right time
Next Steps
Segments
Group contacts for targeted broadcasts
Properties
Store custom data on every contact
Broadcasts
Send targeted messages to your audience via WhatsApp and more
Inbox
Manage all customer conversations in one unified space