> ## Documentation Index
> Fetch the complete documentation index at: https://docs.useinvent.com/llms.txt
> Use this file to discover all available pages before exploring further.
# Properties
> Define custom fields that store extra information on every contact
Properties are custom fields stored on every contact. Out of the box, a contact has a name, email, and phone. Properties let you capture everything else your business cares about: a size preference, a loyalty tier, a renewal date, a marketing opt-in.
Open **Audience → Properties** in the sidebar to manage them.
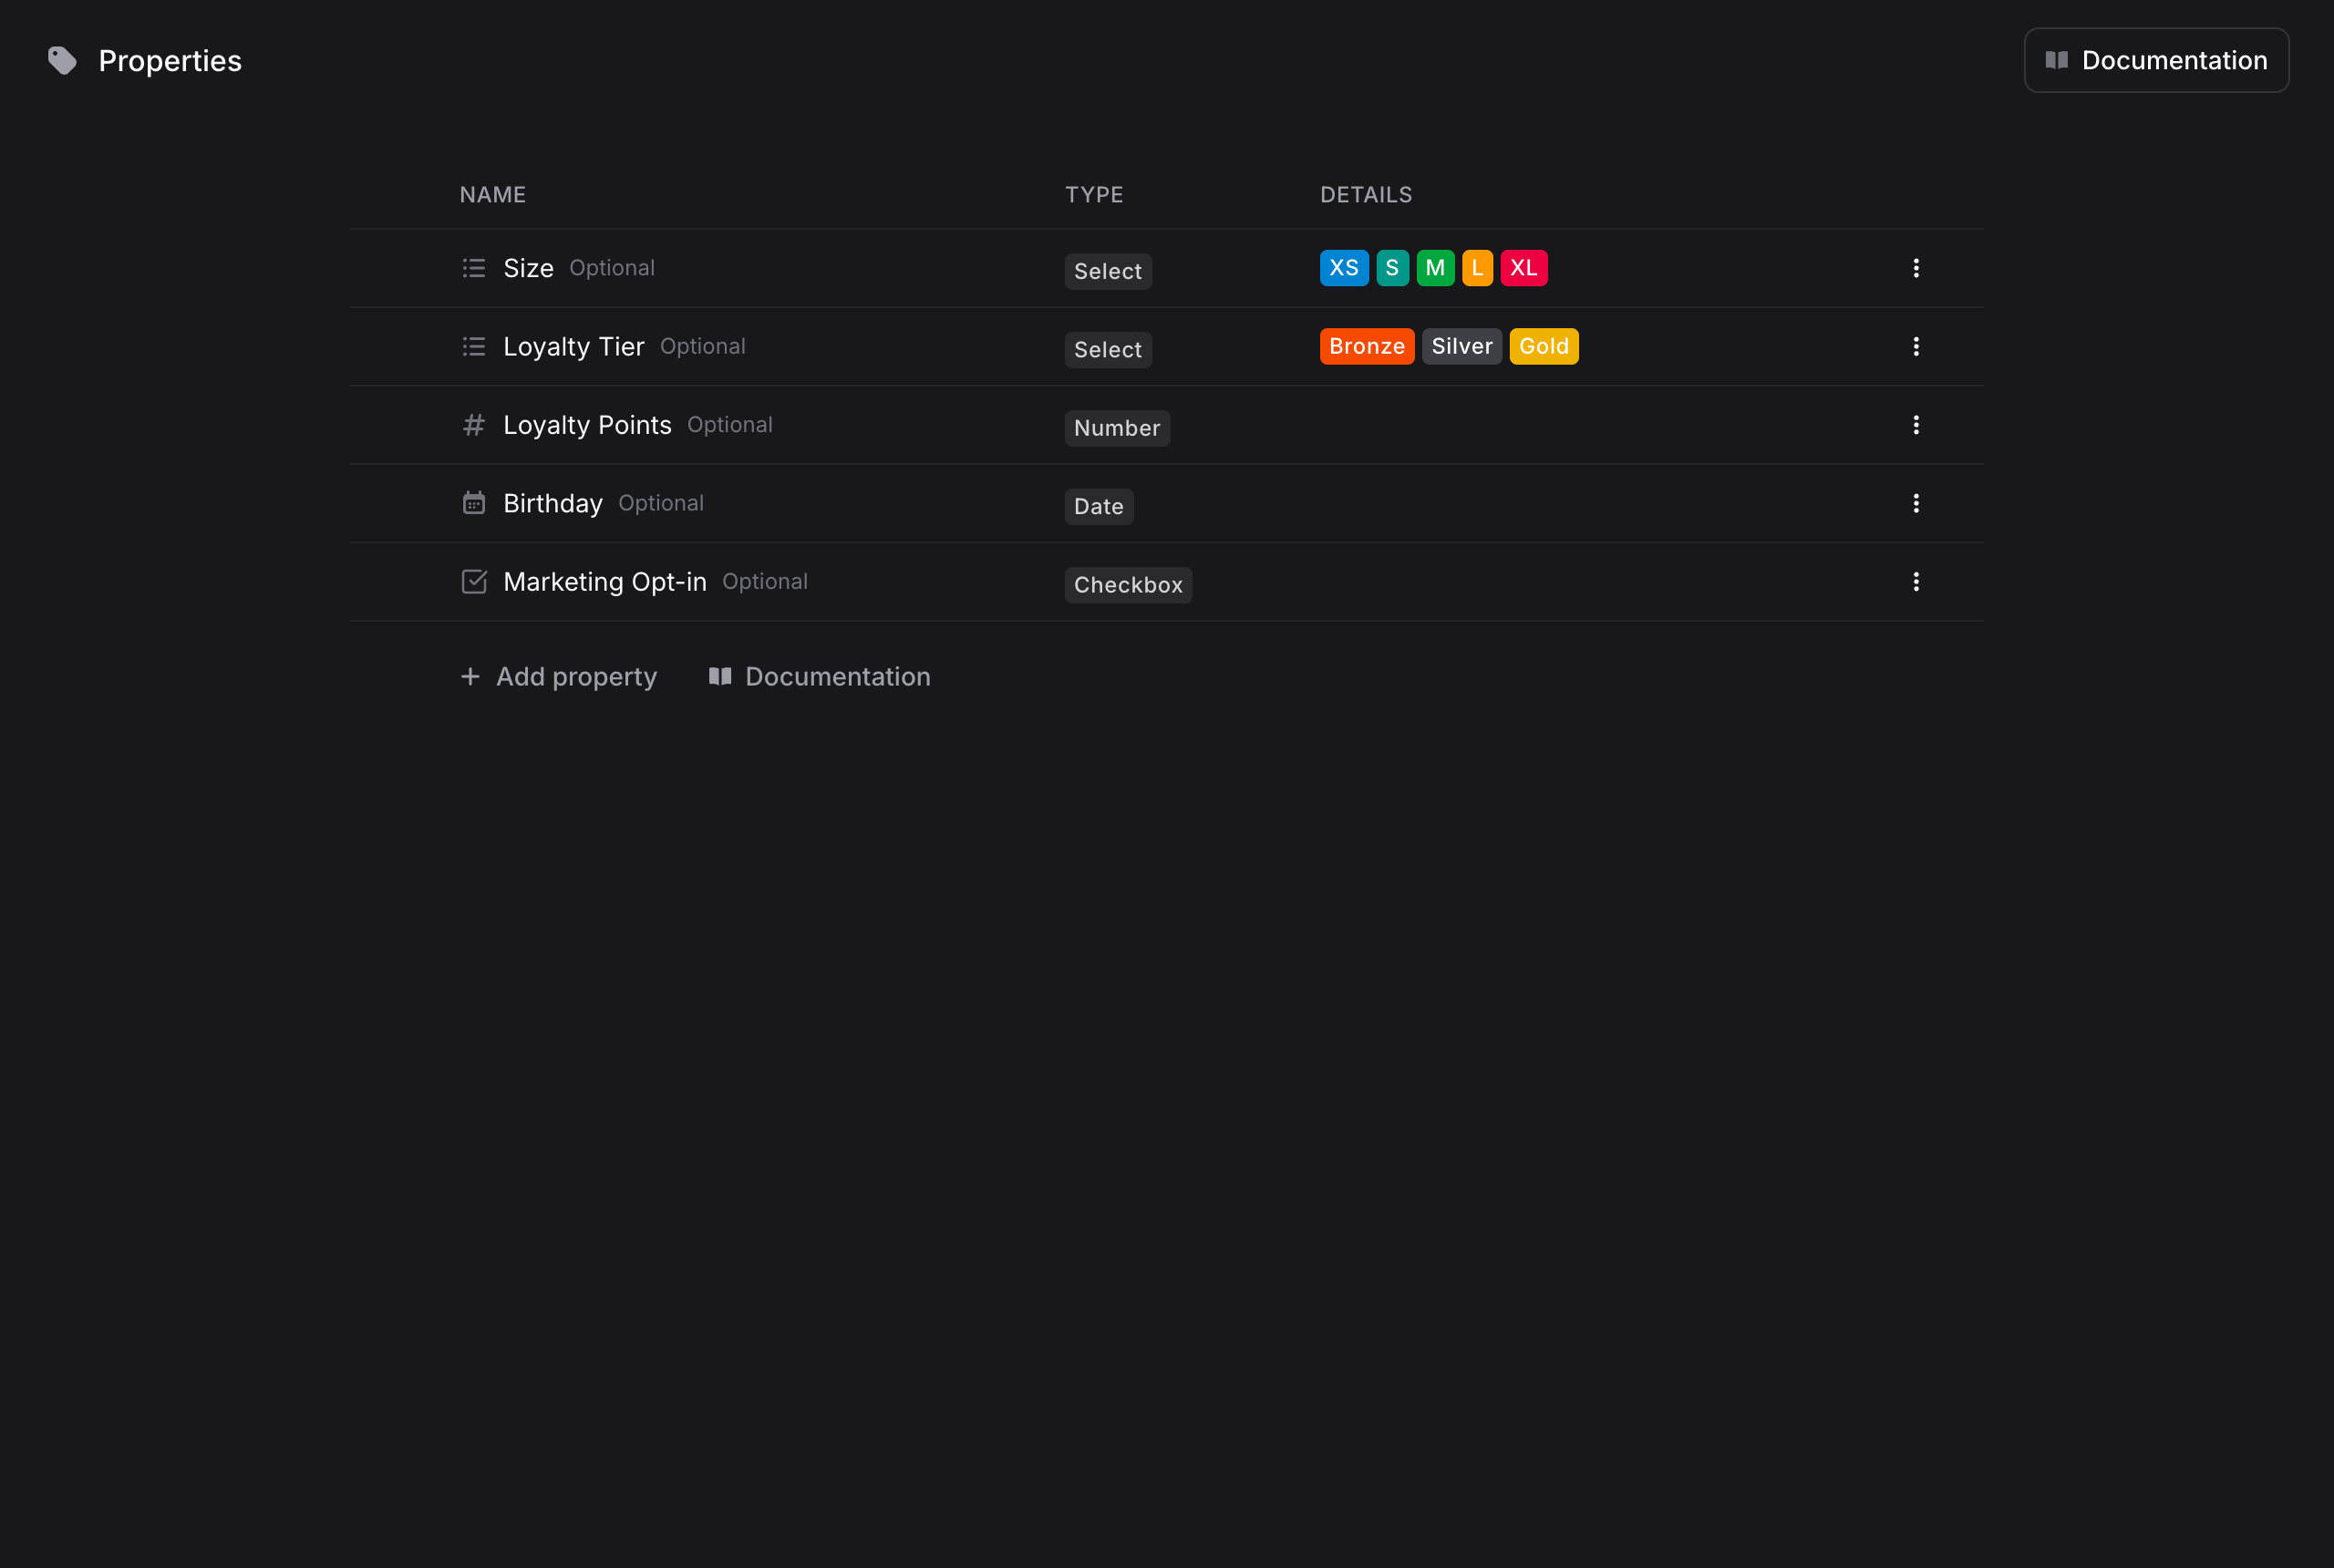 Each property shows its name, its type, and details like the options of a Select property.
Only admins and developers can create or edit contact properties. Other members see the values on contacts but cannot change the property definitions.
## Property Types
| Type | Best for |
| - | - |
| **Text** | Short free-form values (e.g. a referral source) |
| **Long text** | Notes and multi-line values |
| **URL** | Links (e.g. a LinkedIn profile) |
| **Email** | Additional email addresses |
| **Phone** | Additional phone numbers |
| **Number** | Quantities and scores (e.g. loyalty points) |
| **Currency** | Money amounts (e.g. lifetime spend) |
| **Checkbox** | Yes/no flags (e.g. marketing opt-in) |
| **Date** | Dates without a time (e.g. birthday) |
| **Date & time** | Timestamps (e.g. last purchase) |
| **Select** | One option from a fixed list (e.g. loyalty tier) |
| **Multi-select** | Multiple options from a fixed list (e.g. interests) |
## Adding a Property
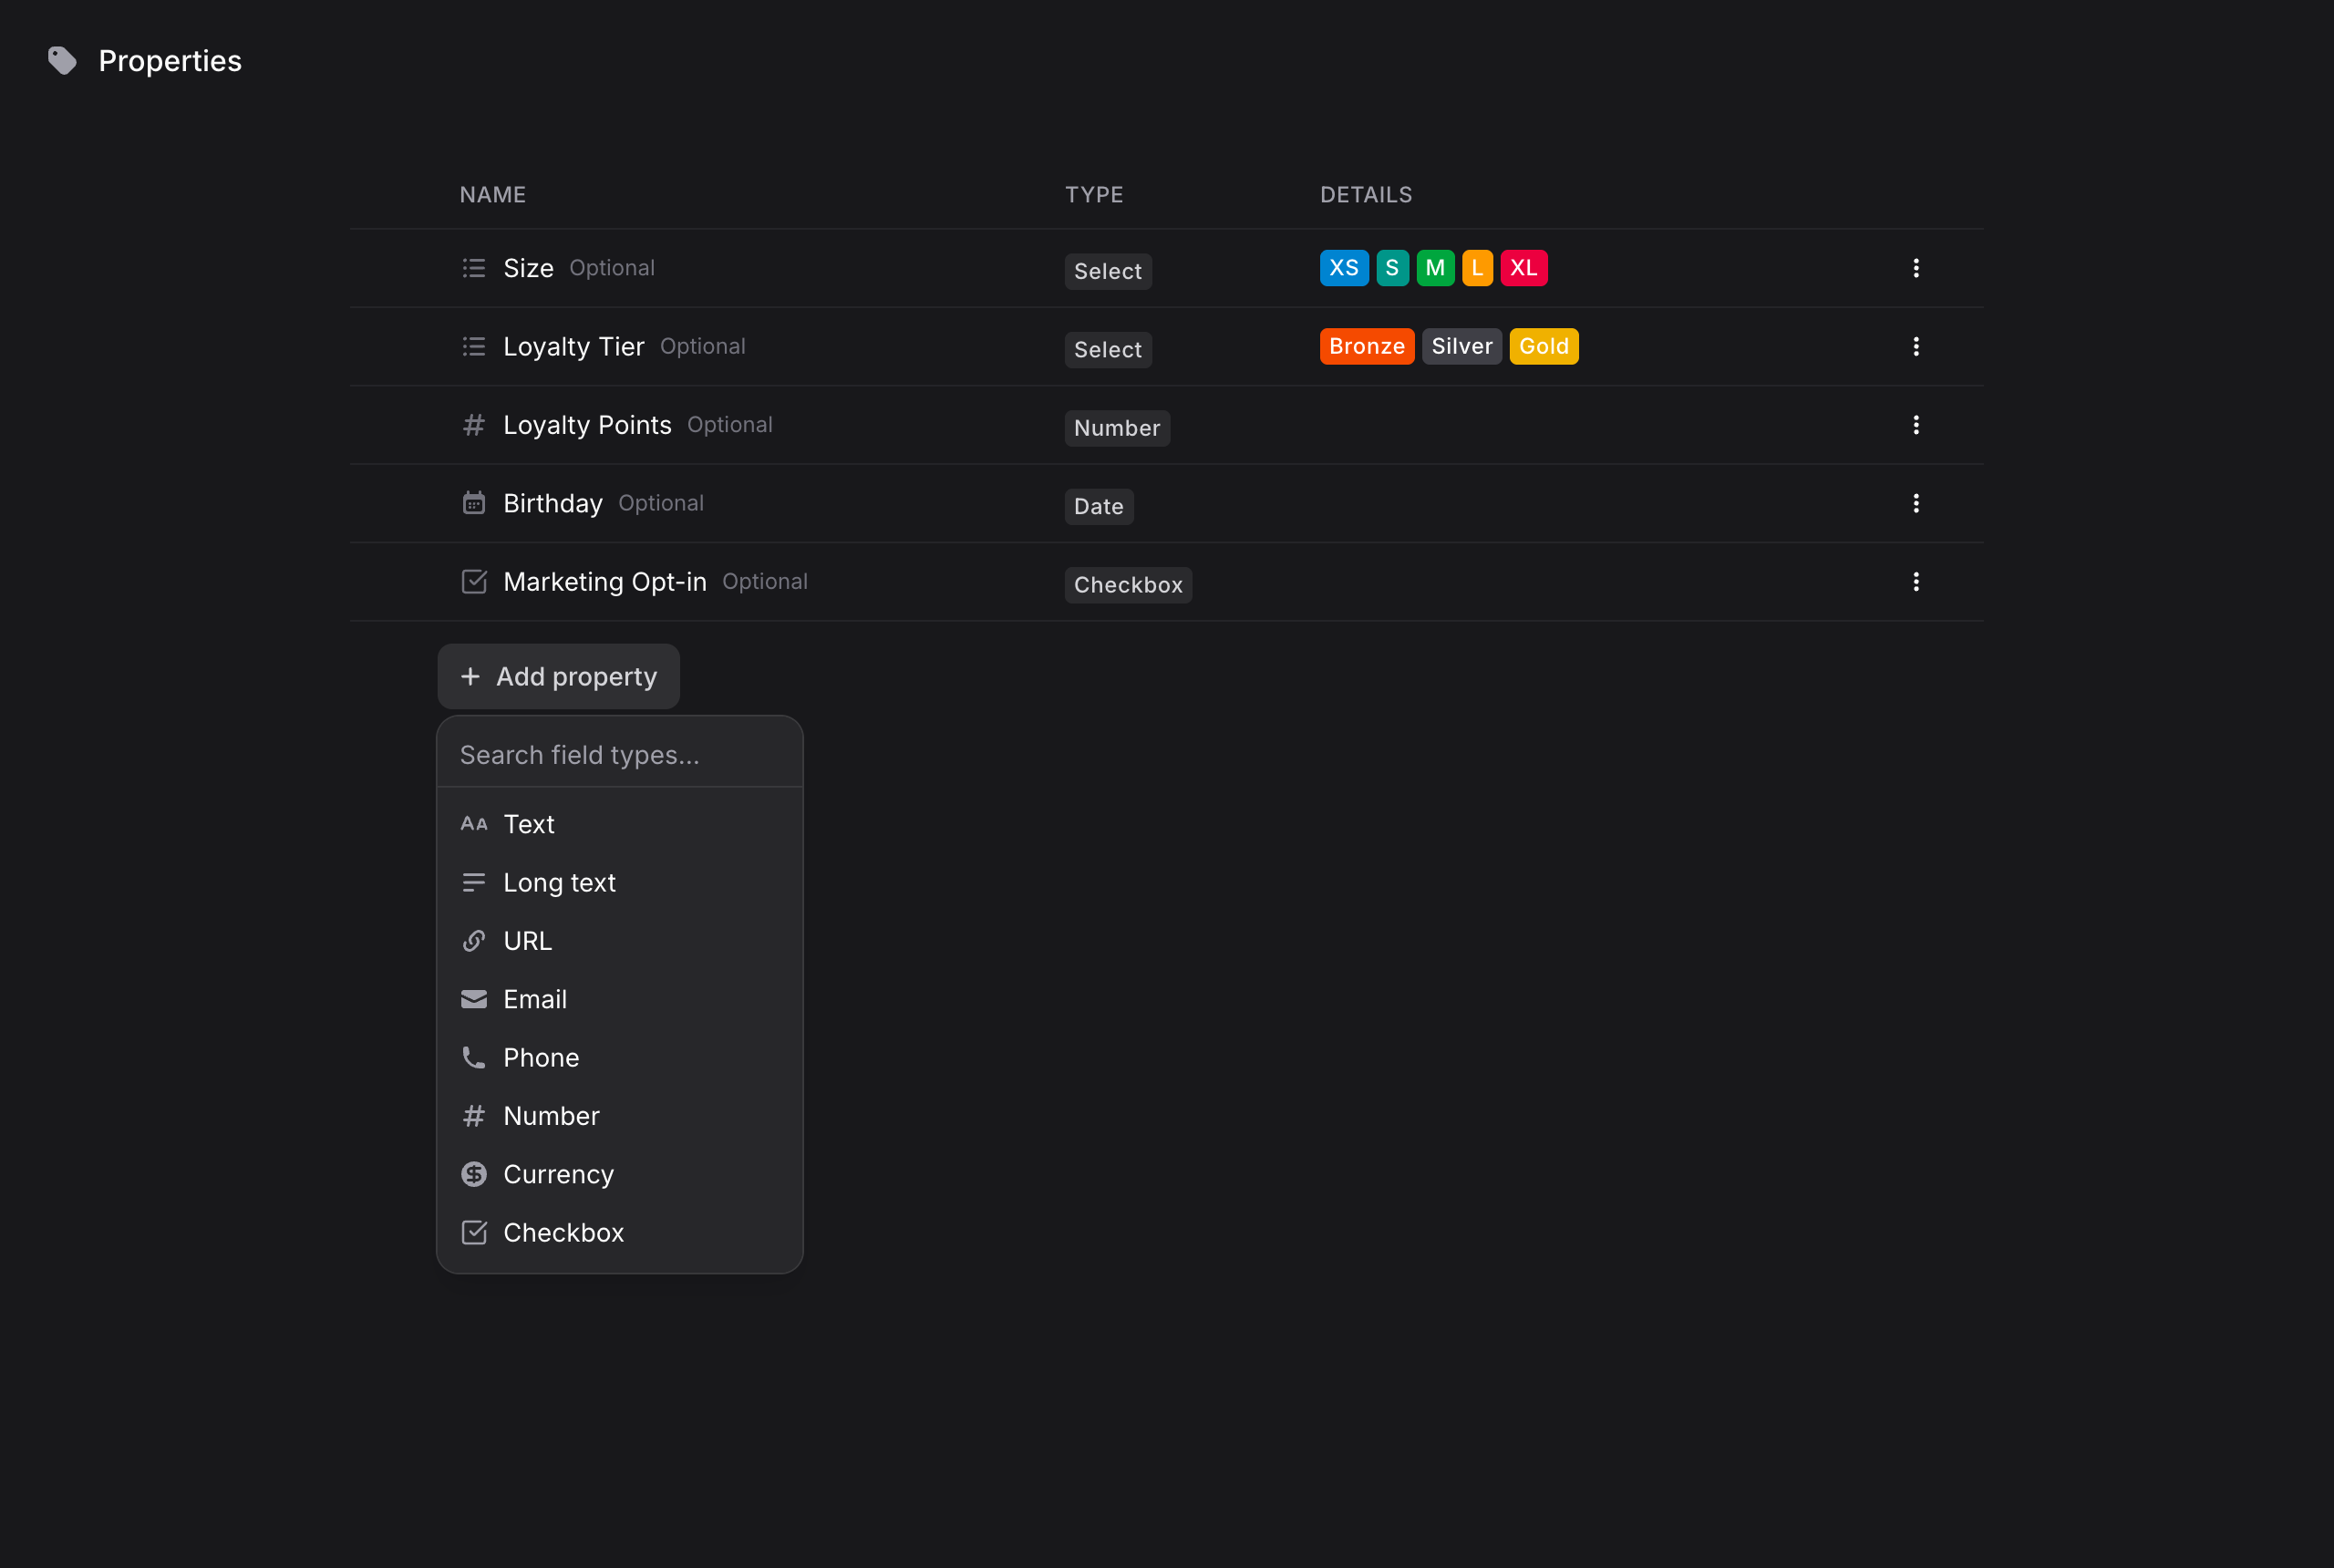
A menu opens where you can search and pick the property type.
Choose the type that matches the data you want to store. For Select and Multi-select, you define the list of options, each with its own color.
Give the property a clear name (e.g., "Loyalty Tier"). The property immediately appears on every contact profile.
Each assistant can have up to 32 contact properties. Once you reach the limit, remove an existing property before adding another.
Each property shows its name, its type, and details like the options of a Select property.
Only admins and developers can create or edit contact properties. Other members see the values on contacts but cannot change the property definitions.
## Property Types
| Type | Best for |
| - | - |
| **Text** | Short free-form values (e.g. a referral source) |
| **Long text** | Notes and multi-line values |
| **URL** | Links (e.g. a LinkedIn profile) |
| **Email** | Additional email addresses |
| **Phone** | Additional phone numbers |
| **Number** | Quantities and scores (e.g. loyalty points) |
| **Currency** | Money amounts (e.g. lifetime spend) |
| **Checkbox** | Yes/no flags (e.g. marketing opt-in) |
| **Date** | Dates without a time (e.g. birthday) |
| **Date & time** | Timestamps (e.g. last purchase) |
| **Select** | One option from a fixed list (e.g. loyalty tier) |
| **Multi-select** | Multiple options from a fixed list (e.g. interests) |
## Adding a Property
A menu opens where you can search and pick the property type.
Choose the type that matches the data you want to store. For Select and Multi-select, you define the list of options, each with its own color.
Give the property a clear name (e.g., "Loyalty Tier"). The property immediately appears on every contact profile.
Each assistant can have up to 32 contact properties. Once you reach the limit, remove an existing property before adding another.
 ## Managing Properties
From the Properties page you can:
* **Rename a property** by clicking its name
* **Reorder properties** by dragging the handle that appears on hover. The order here is the order shown on contact profiles
* **Edit options** via the three-dot menu: change the option list of a Select property, tweak formatting, or delete the property
Deleting a property permanently removes its values from all contacts.
## Properties on the Contact Profile
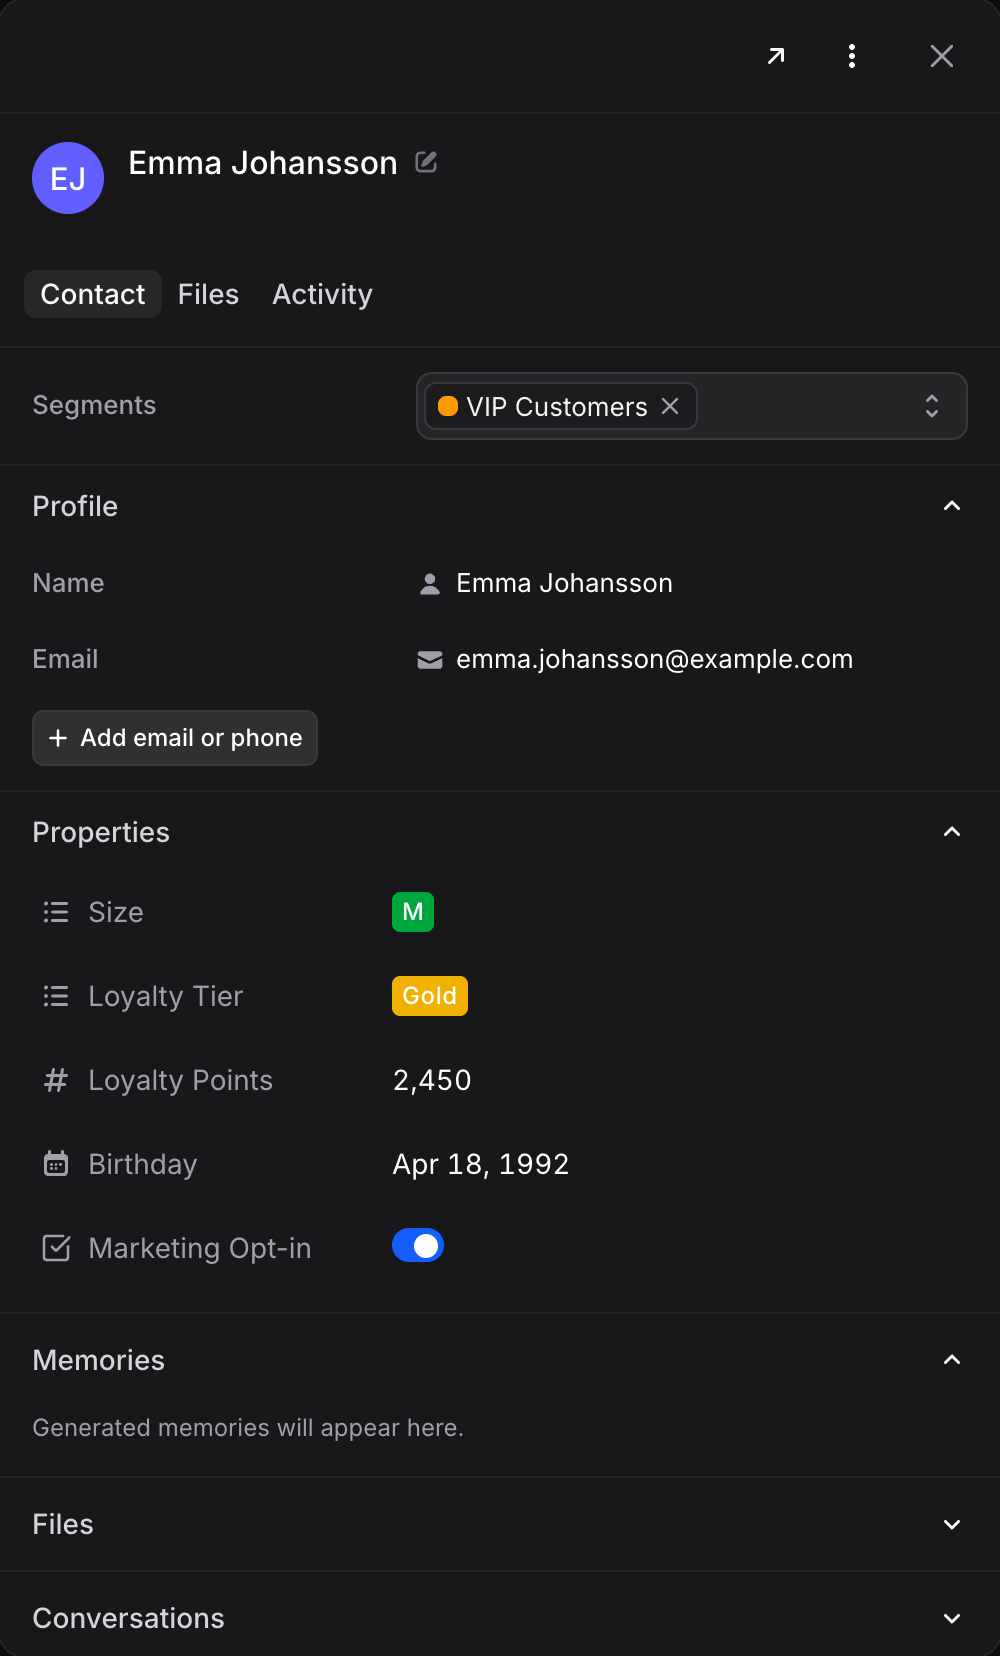
Every property appears in the **Properties** section of the contact profile panel, where you can view and edit values inline.
## Managing Properties
From the Properties page you can:
* **Rename a property** by clicking its name
* **Reorder properties** by dragging the handle that appears on hover. The order here is the order shown on contact profiles
* **Edit options** via the three-dot menu: change the option list of a Select property, tweak formatting, or delete the property
Deleting a property permanently removes its values from all contacts.
## Properties on the Contact Profile
Every property appears in the **Properties** section of the contact profile panel, where you can view and edit values inline.
 ## Let Your Assistant Fill Properties
Properties become really powerful combined with your AI assistants. With the **Contact Properties** capability switched on, an assistant saves contact details (name, email, phone, and any custom properties it may edit) directly to the contact profile as it learns them in conversation.
For example, when a customer mentions they usually wear a size M, the assistant can set the "Size" property on their contact, no manual data entry needed.
To enable it:
Go to **Assistants**, pick your assistant, and scroll to the **Contact Properties** section of the Settings tab.
This lets the assistant save contact details directly to the contact profile. **Name**, **Email** and **Phone** are locked **System** rows, always available to the assistant; each channel decides which of them it may fill in.
Each custom property starts as **None**. Choose what the assistant may do with it:
* **None**: The assistant cannot see this
* **Read**: The assistant can read this
* **Edit**: The assistant can read and update this
Click **Save changes**. The assistant applies the new access on its next conversation.
## Let Your Assistant Fill Properties
Properties become really powerful combined with your AI assistants. With the **Contact Properties** capability switched on, an assistant saves contact details (name, email, phone, and any custom properties it may edit) directly to the contact profile as it learns them in conversation.
For example, when a customer mentions they usually wear a size M, the assistant can set the "Size" property on their contact, no manual data entry needed.
To enable it:
Go to **Assistants**, pick your assistant, and scroll to the **Contact Properties** section of the Settings tab.
This lets the assistant save contact details directly to the contact profile. **Name**, **Email** and **Phone** are locked **System** rows, always available to the assistant; each channel decides which of them it may fill in.
Each custom property starts as **None**. Choose what the assistant may do with it:
* **None**: The assistant cannot see this
* **Read**: The assistant can read this
* **Edit**: The assistant can read and update this
Click **Save changes**. The assistant applies the new access on its next conversation.
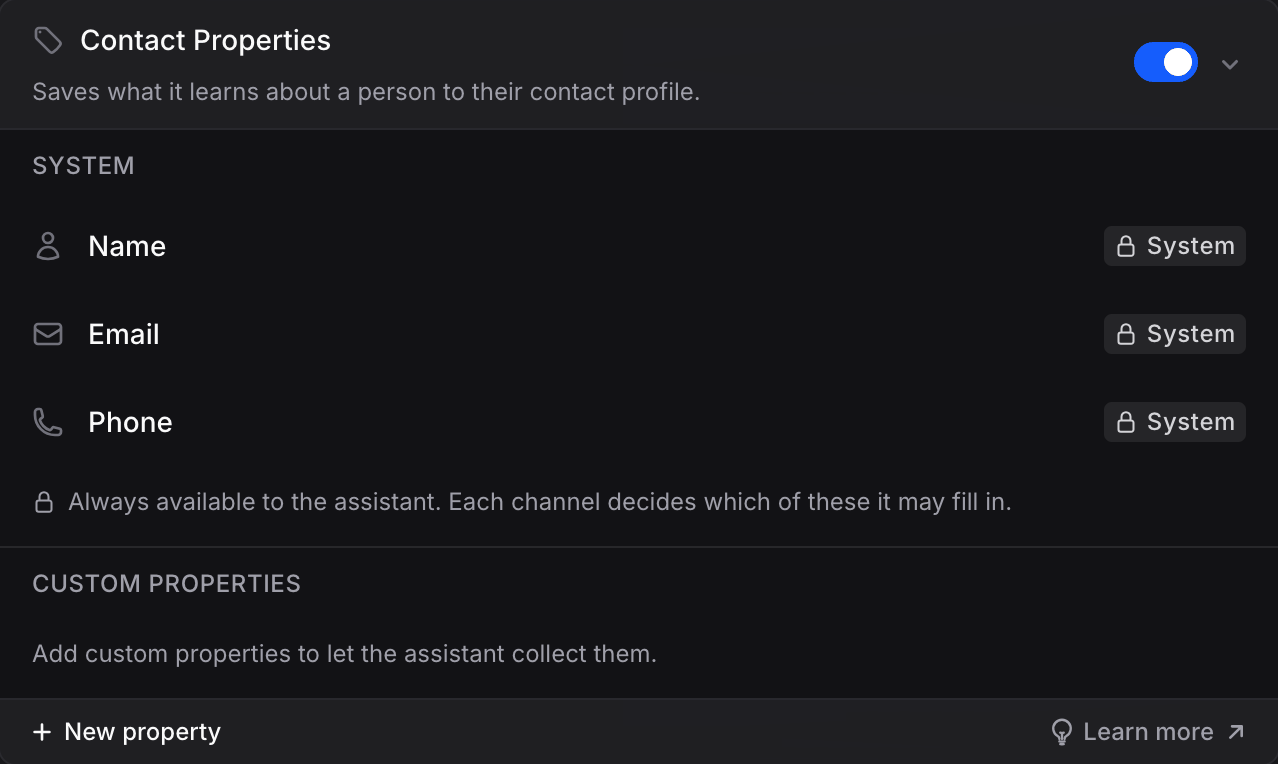 Access is per assistant, so a support assistant can update a "Size" property while a billing assistant cannot even see it. See [Assistant Configuration](/assistants/introduction#assistant-configuration) for the rest of the assistant settings.
## Setting Values via the API
Developers can set property values programmatically when creating or updating contacts through the [API](/api-reference/getting-started/introduction), using the property keys defined on this page.
## Best Practices
1. **Start small**: A handful of properties your team actually fills beats a long list of empty fields
2. **Prefer Select over Text** for anything with known values: options keep data consistent and filterable
3. **Name properties for humans**: "Loyalty Tier" is better than "tier\_lvl"
4. **Pair with assistants**: Let the AI keep properties up to date automatically with the Contact Properties capability
## Next Steps
Group contacts for targeted broadcasts
Explore what your assistant can understand and respond with
This documentation is built and hosted on [Mintlify](https://mintlify.com), a developer documentation platform.
Access is per assistant, so a support assistant can update a "Size" property while a billing assistant cannot even see it. See [Assistant Configuration](/assistants/introduction#assistant-configuration) for the rest of the assistant settings.
## Setting Values via the API
Developers can set property values programmatically when creating or updating contacts through the [API](/api-reference/getting-started/introduction), using the property keys defined on this page.
## Best Practices
1. **Start small**: A handful of properties your team actually fills beats a long list of empty fields
2. **Prefer Select over Text** for anything with known values: options keep data consistent and filterable
3. **Name properties for humans**: "Loyalty Tier" is better than "tier\_lvl"
4. **Pair with assistants**: Let the AI keep properties up to date automatically with the Contact Properties capability
## Next Steps
Group contacts for targeted broadcasts
Explore what your assistant can understand and respond with
This documentation is built and hosted on [Mintlify](https://mintlify.com), a developer documentation platform.